¶ General View

¶ Functional Capabilities
¶ "Profile Settings" Page
Your profile settings are organized into five main sections:
- Avatar Settings - Profile image customization
- Personal Data - Basic information and preferences
- Contact Information - Phone verification for testing
- Notifications - Email alert preferences
- Password Change - Account security management
¶ Avatar Settings
Setting Your Profile Picture:
- Access the Avatar Section: Click on your current avatar image
- Select Image File: Choose a photo from your device
- File Requirements:
- Supported formats: JPEG, JPG, or PNG
- Maximum file size: 5MB
- Recommended: Square images work best for profile pictures
Image Customization:
- Crop Tool: After selecting your image, use the cropping tool to adjust the visible area
- Positioning: Center your face or main subject within the crop area
- Preview: Review how your avatar will appear before saving
- Save Changes: Click save to apply your new profile image
¶ Personal Data
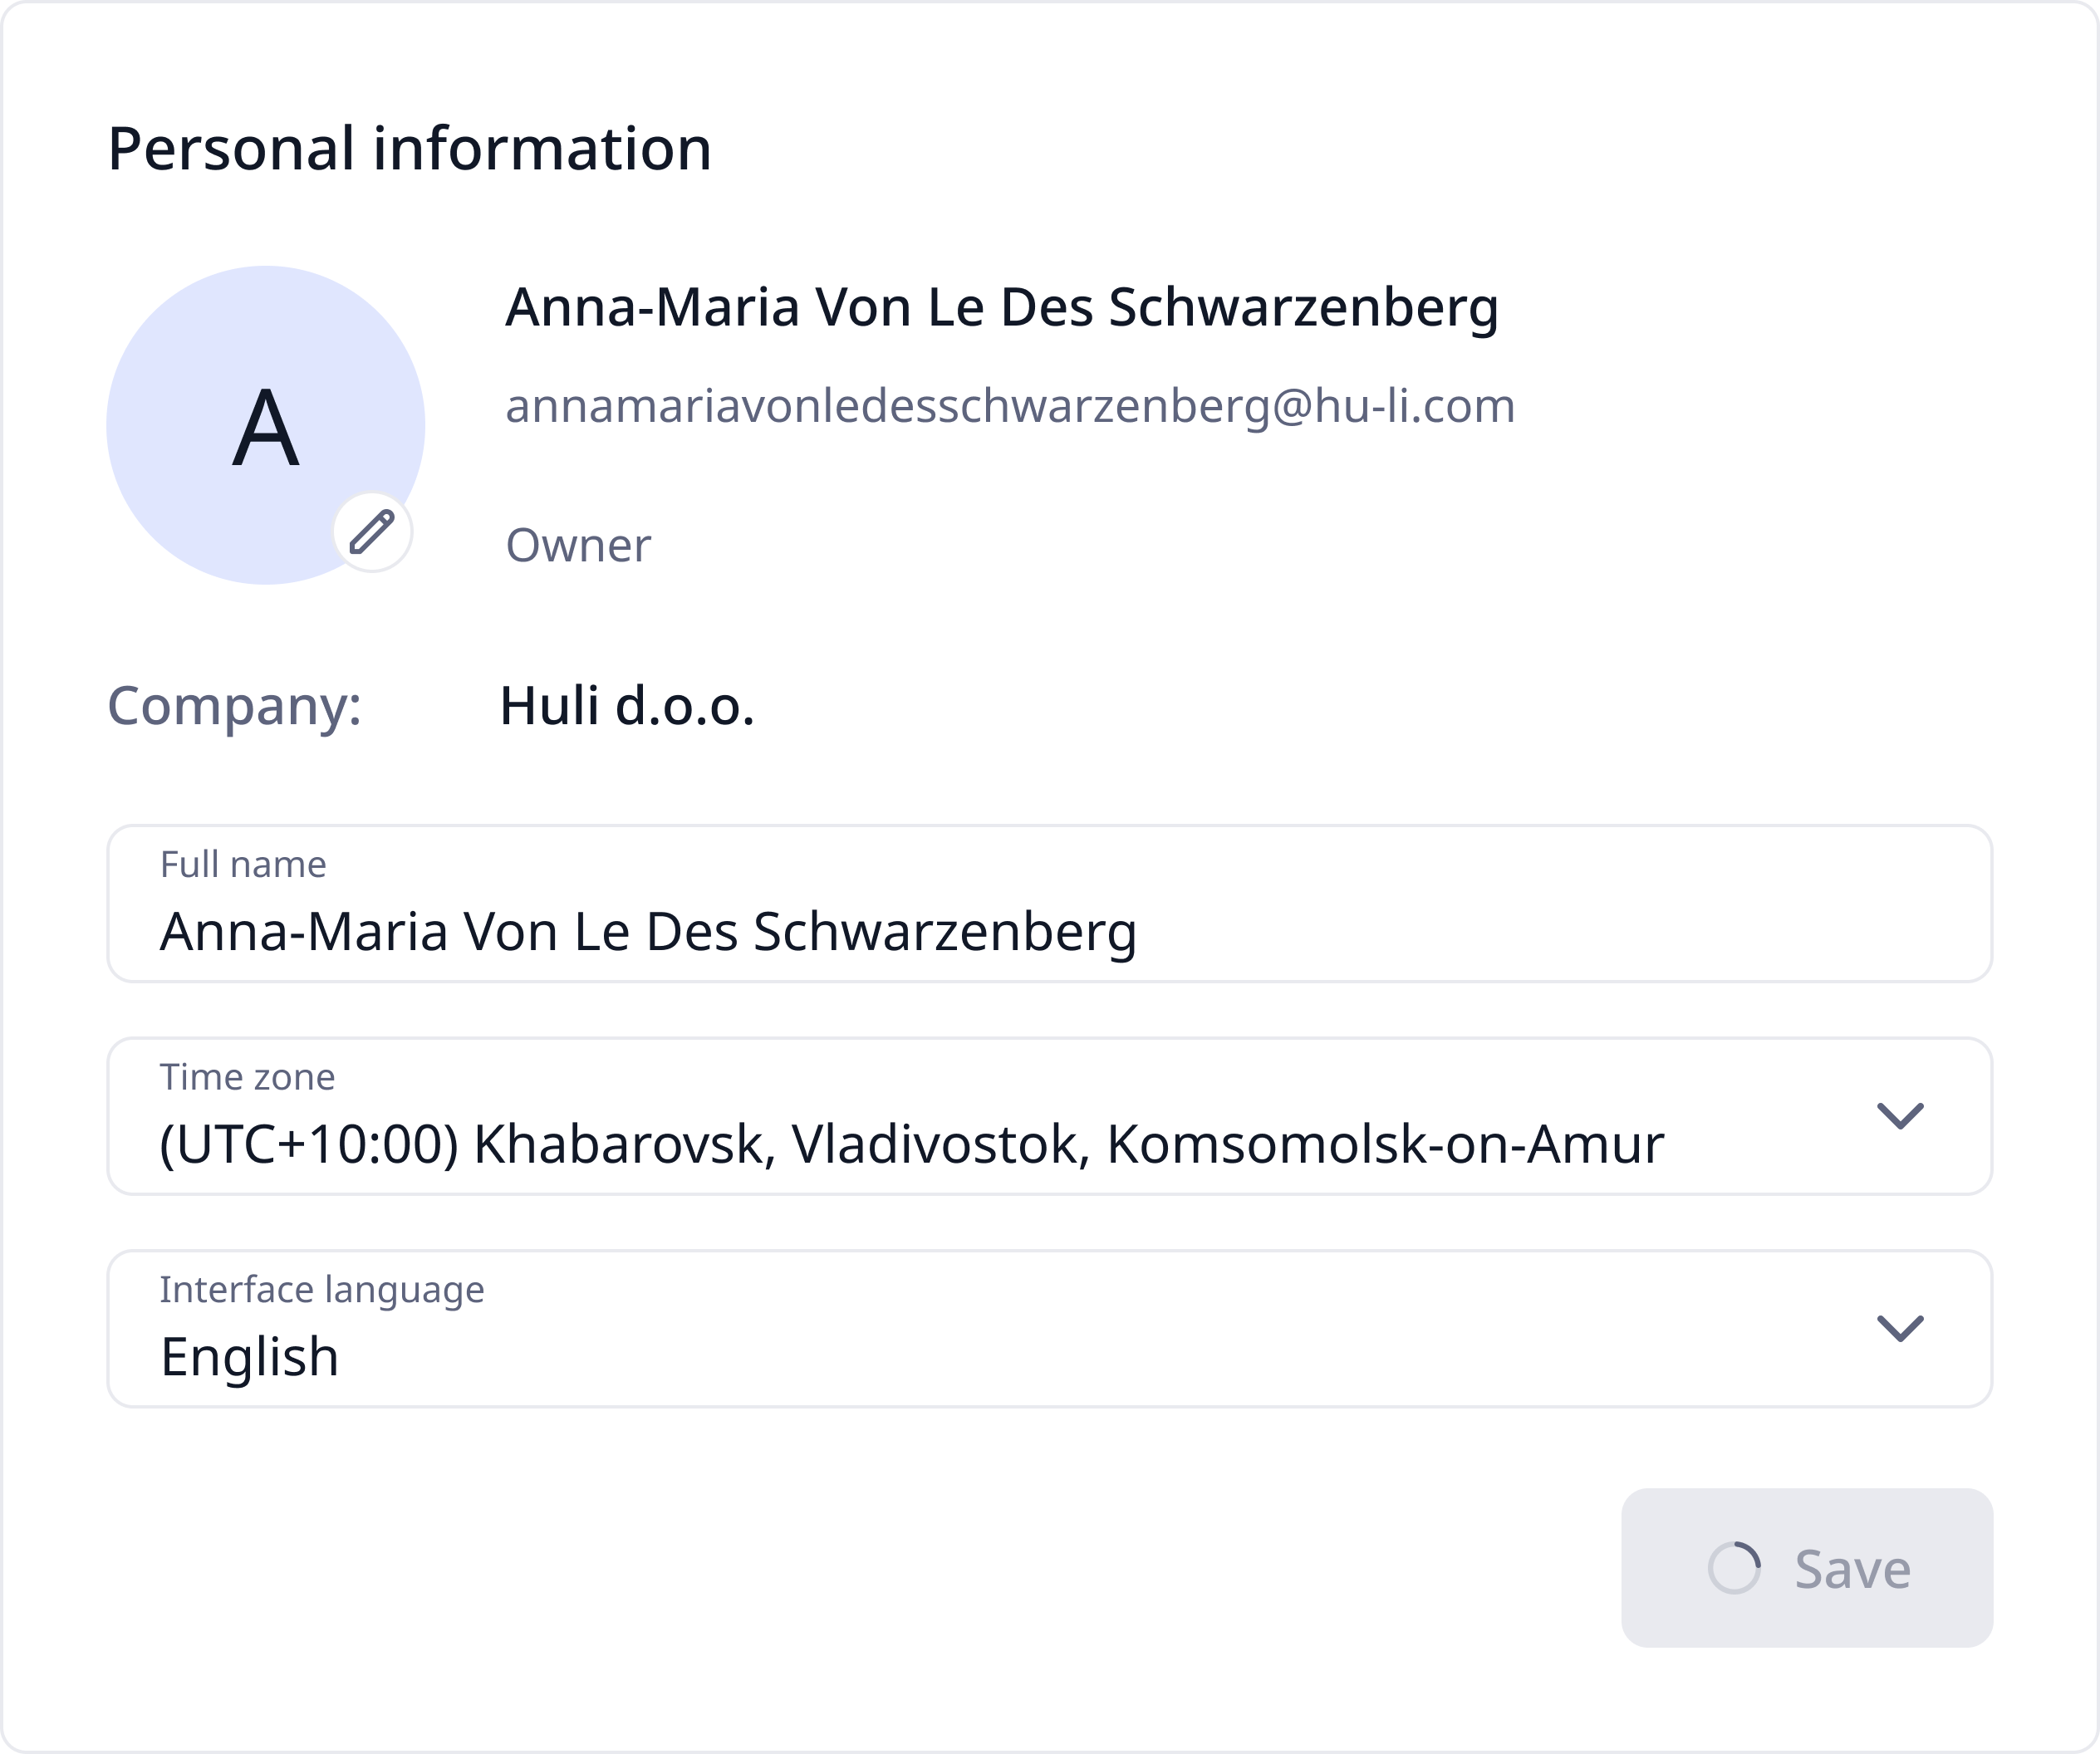
- Update your name: Enter or modify your complete name
- Format requirements: Follow the same guidelines as registration (Latin letters, spaces, hyphens only)
Time Zone Selection:
- Critical for agent operation: Select your correct time zone from the dropdown list
- Campaign scheduling: Affects when automated calls and campaigns are executed
Interface Language Preference:
- Choose your preferred language from the dropdown menu
- Platform display: Changes the language of menus, buttons, and interface elements
- Agent creation: May affect default language options for new agents
- Can be changed anytime: Update as needed for your comfort and efficiency
¶ Contact Information
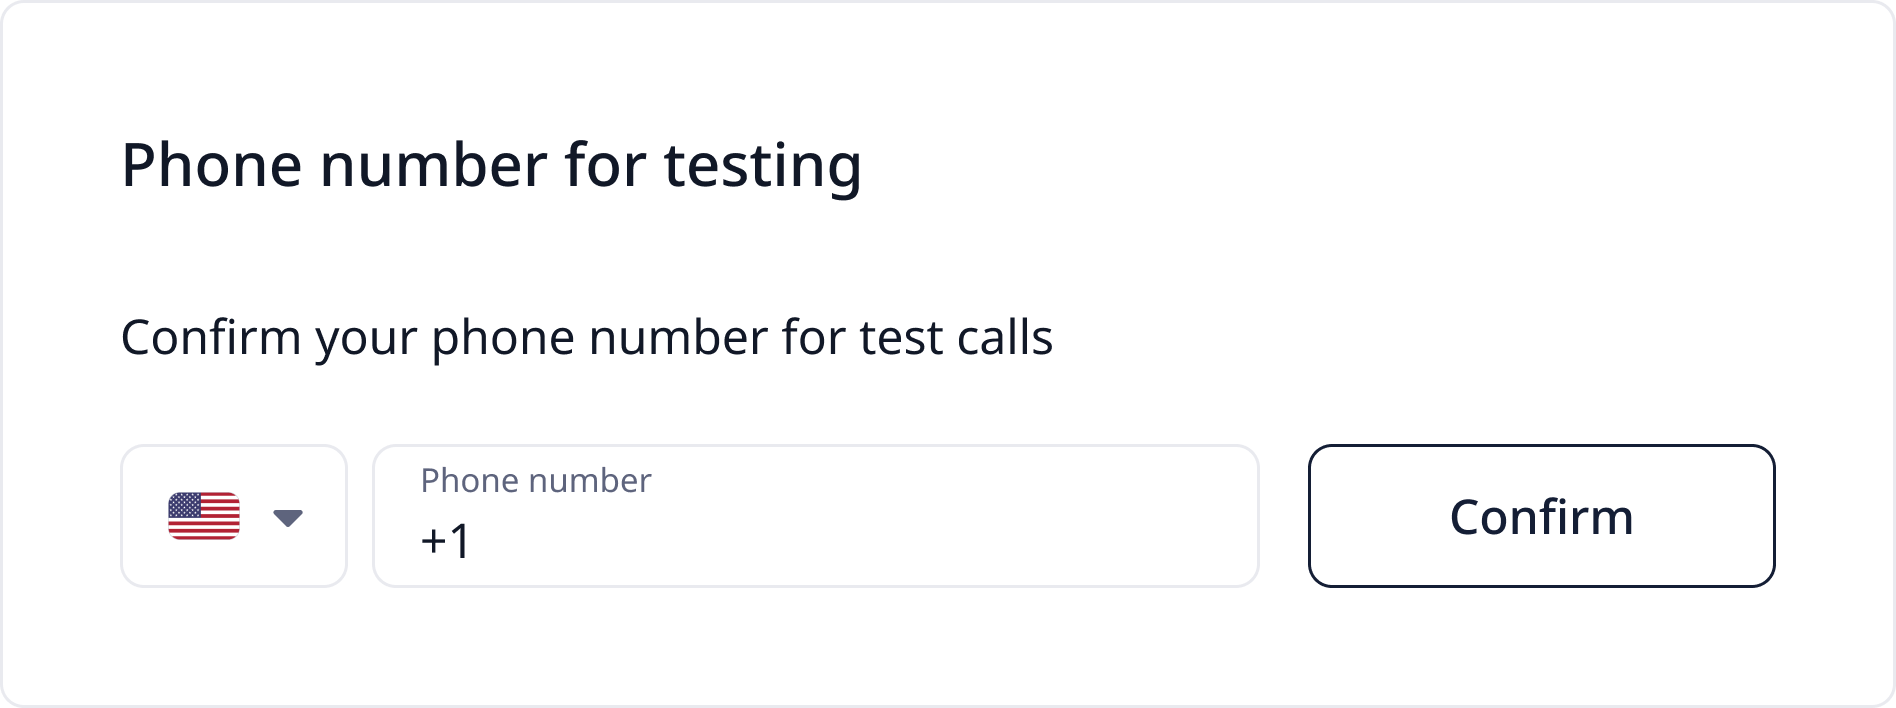
Purpose of Phone Verification:
- Required for testing voice agents during development
- Allows you to experience your agent as customers would
- Eliminates need to re-verify for each new agent creation
¶ Verification Process
Step 1: Enter Phone Number
- Navigate to the "Phone number for testing" section
- Enter your mobile phone number in the specified format
- Use a number you have immediate access to: You'll need to receive SMS messages
Step 2: Request Verification
- Click the "Confirm" button to initiate the verification process
- SMS delivery: A confirmation code will be sent to your specified number
- Timing: SMS should arrive within a few minutes
Step 3: Complete Verification
- Check your messages: Look for the SMS with the confirmation code
- Enter the code: Input the received code in the website's verification field
- Complete verification: Submit the code to finish the process
¶ Notifications
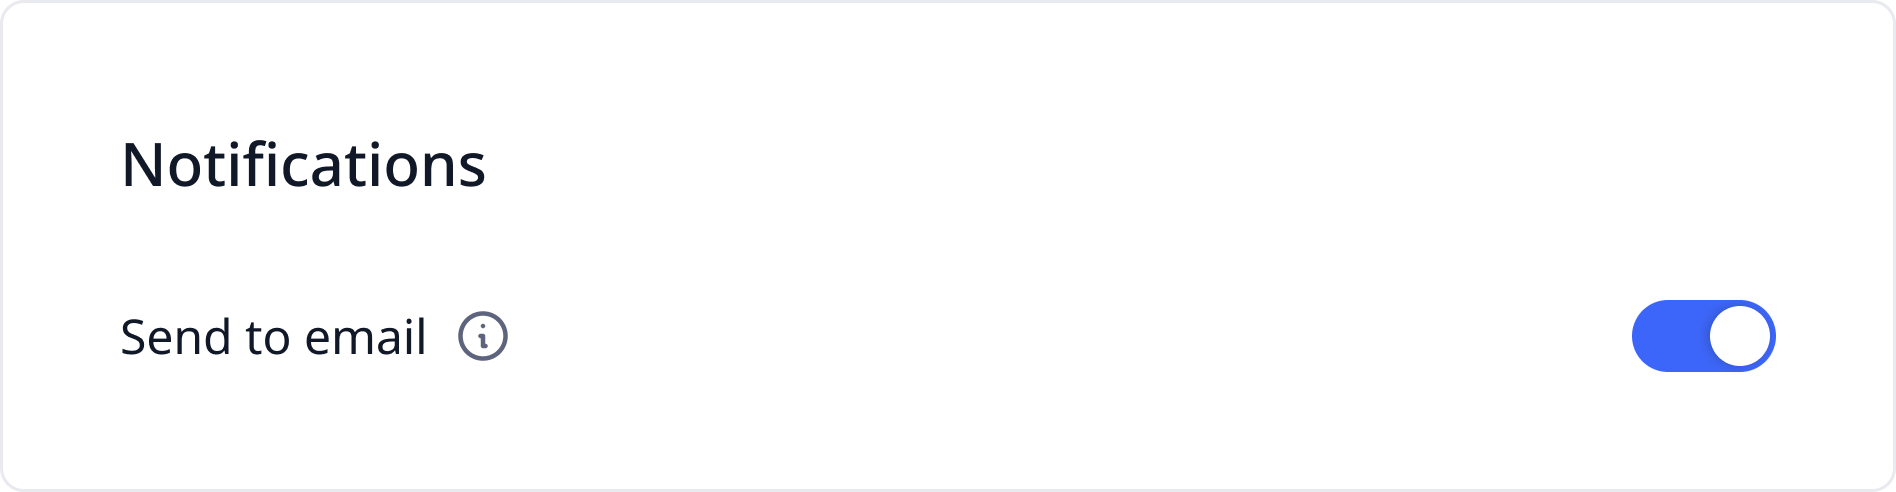
Notification Settings:
- Toggle control: Use the switch to enable or disable email notifications
- Activation: Click the toggle to turn notifications on (enabled state)
- Deactivation: Click again to turn notifications off
Account Alerts:
- Plan expiration warnings: Receive advance notice before your subscription expires
- Minute balance alerts: Get notified when your agent's calling minutes are running low
- Critical notifications: Important account status changes and system updates
¶ Password Change (Account Security Management)
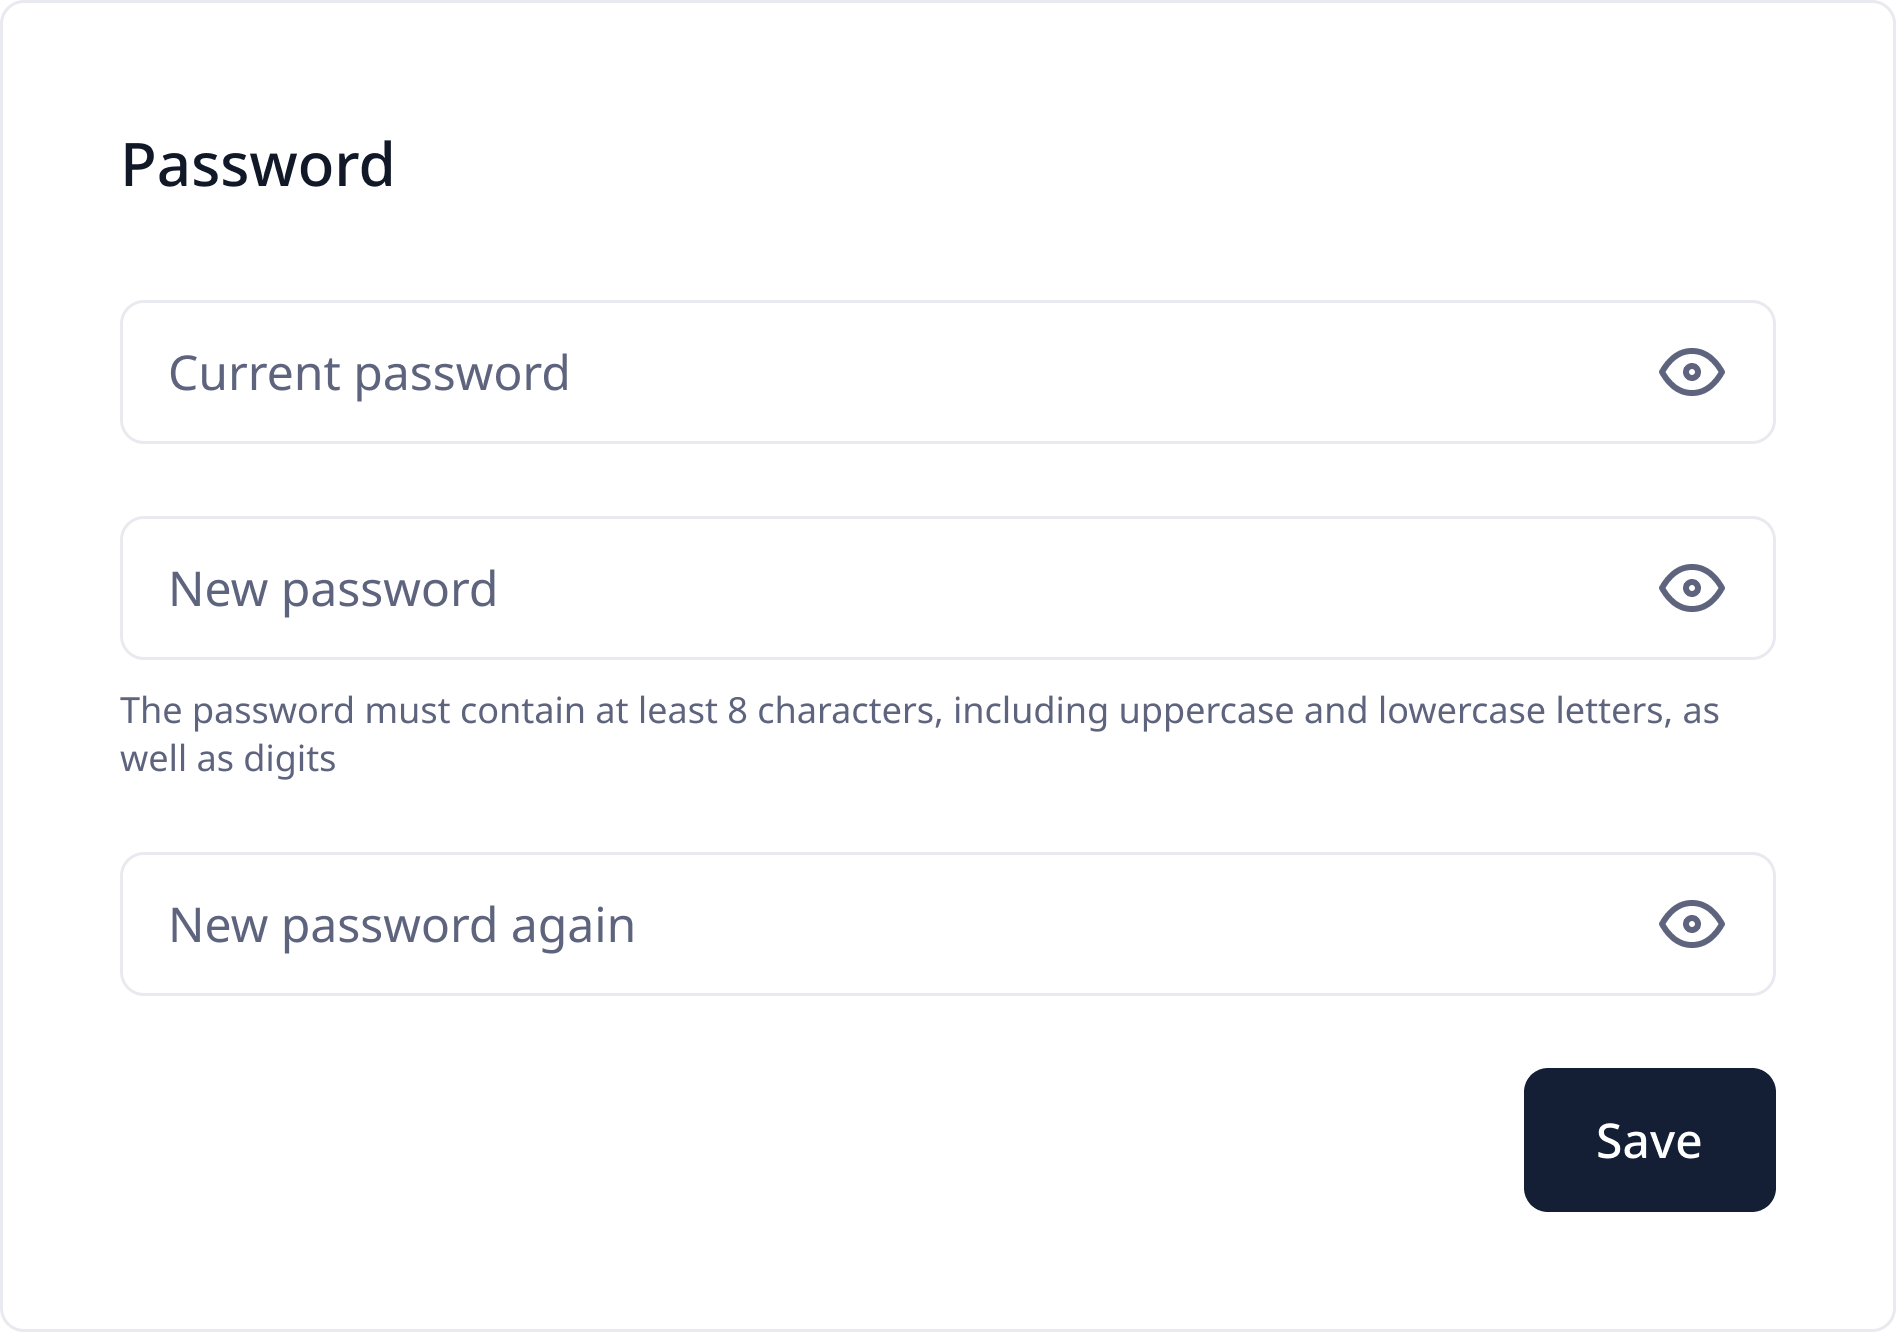
¶ Account Security Management
When to Change Your Password:
- Regular security maintenance (recommended every 3-6 months)
- If you suspect your account may be compromised
- After sharing your password accidentally
- To comply with your organization's security policies
Step 1: Enter your current password in the first field
Step 2: Create new password and type it into second field
Password Requirements: Your password must meet all of the following criteria:
- Minimum length: 8 characters
- Include digits: any rom 0 to 9
- Uppercase letters: any capital letters from A to Z
- Lowercase letters: any lowercase letters from a to z
Step 3: Re-enter your new password in the confirmation field