¶ Step 1: Select a Template
¶ Finding the Right Template
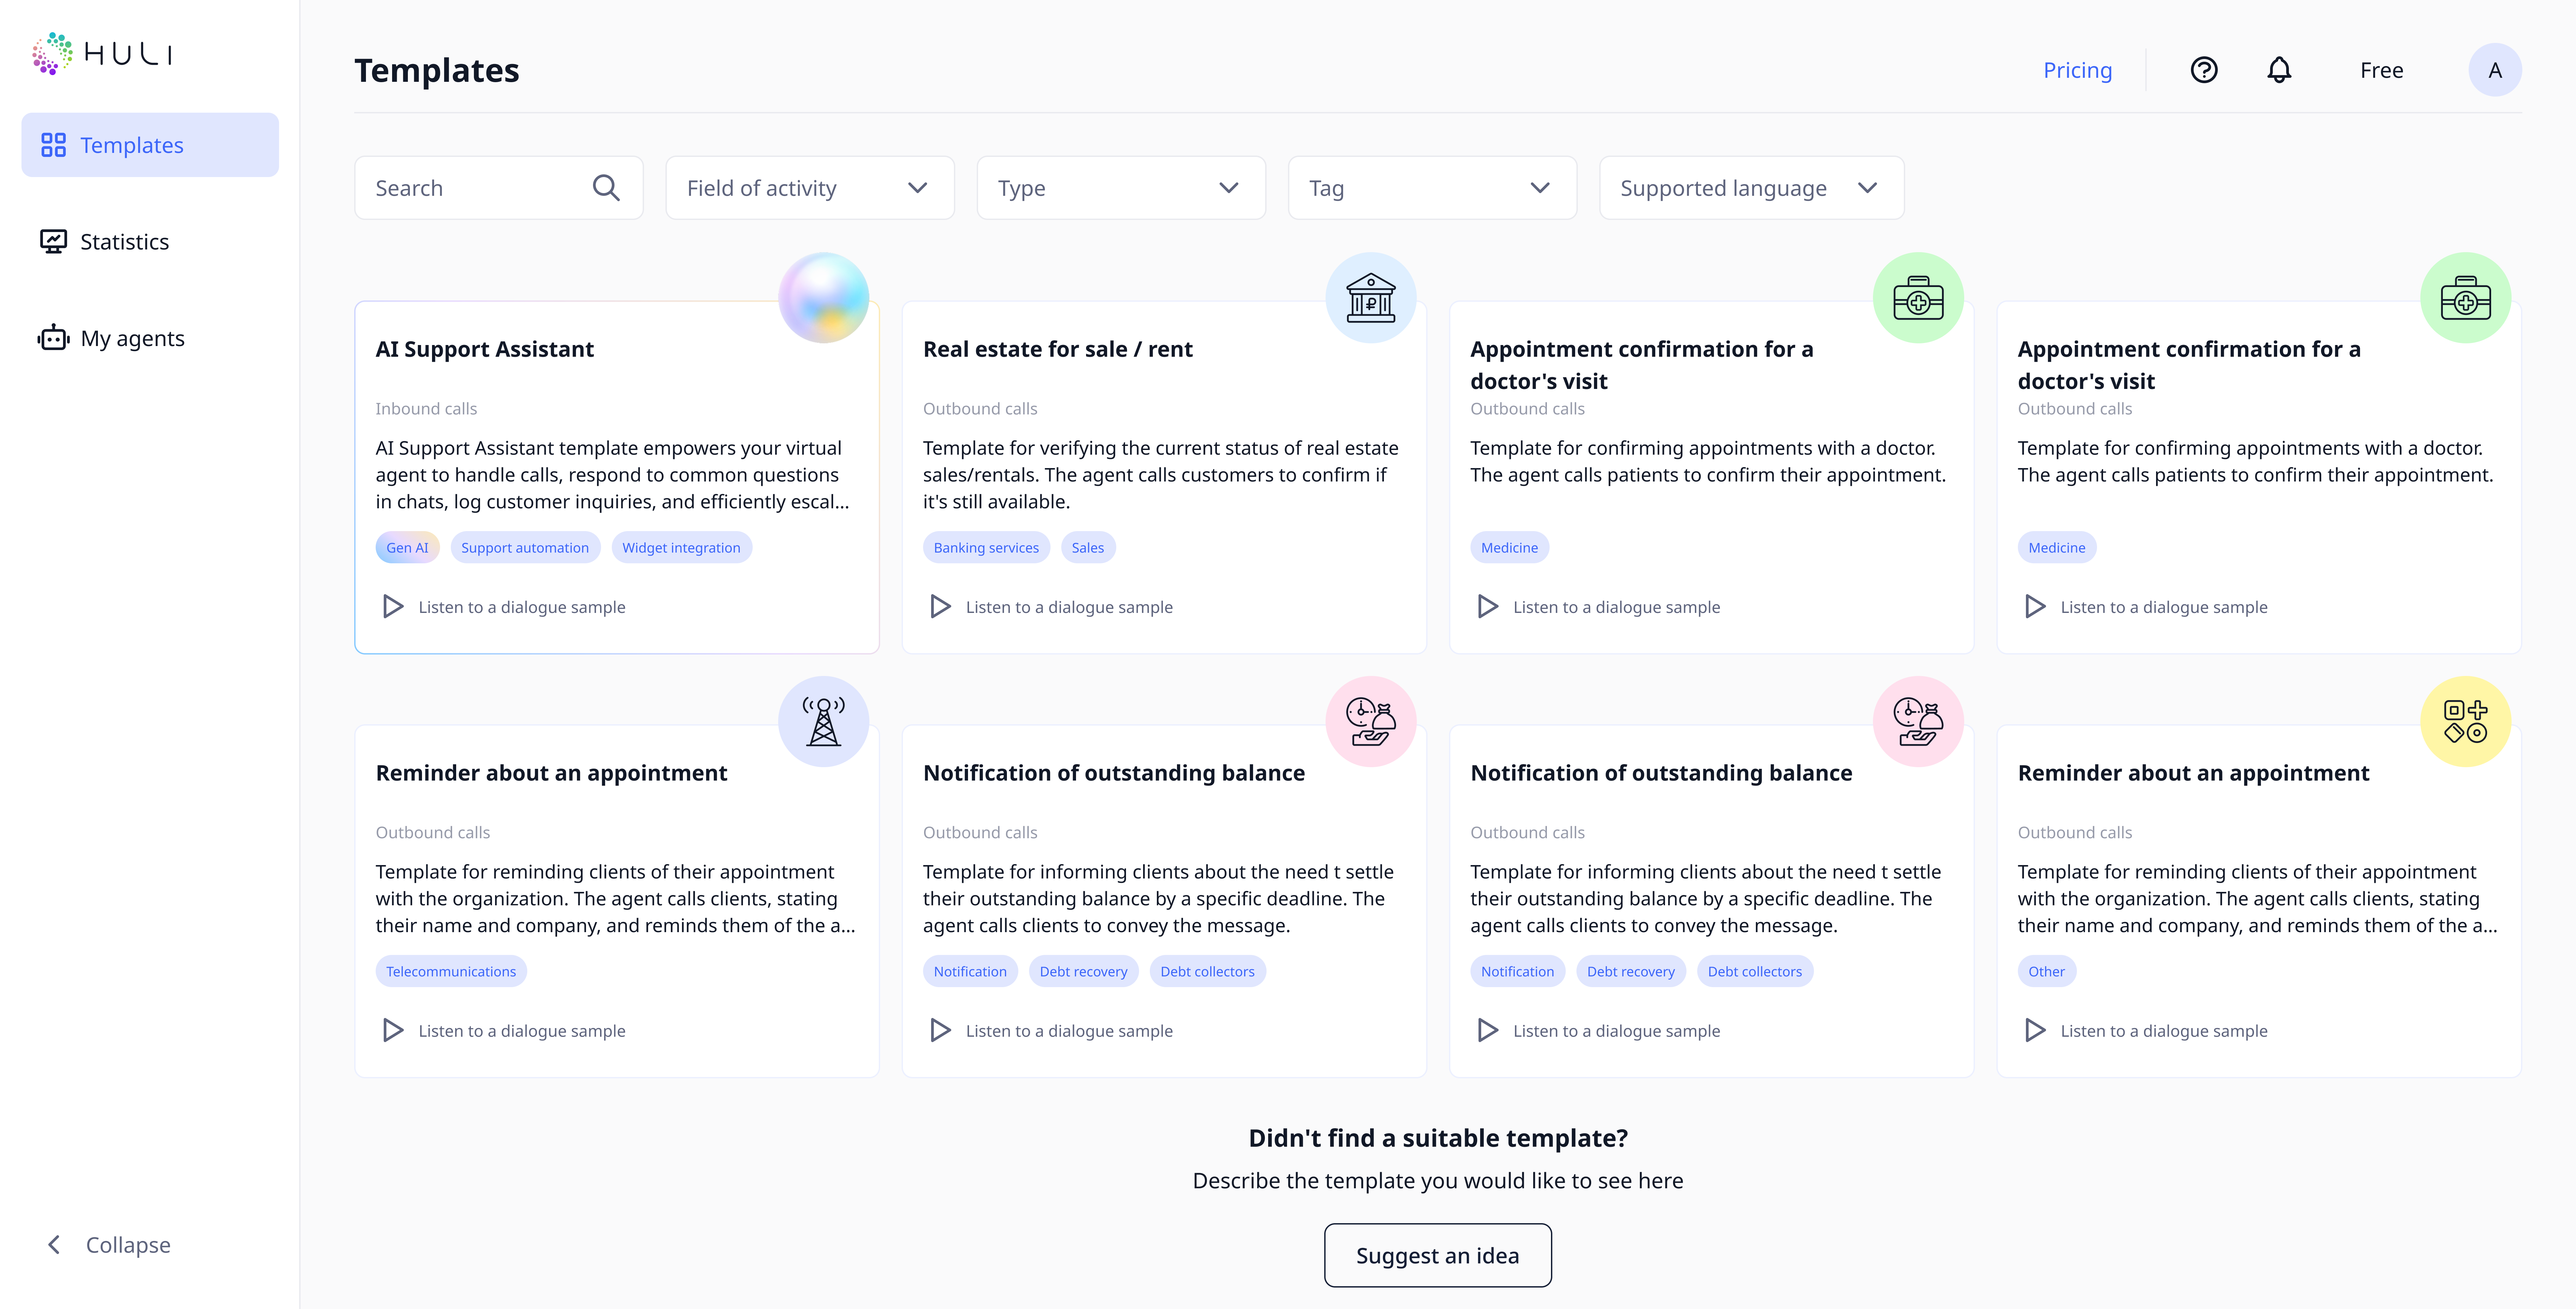
Access the Template Library:
- Navigate to the Templates page using the main menu
- Browse through available templates designed for different industries and use cases
Search and Filter Options:
- Use the search bar to find templates by keywords
- Apply filters to narrow down options by:
- Field of activity
- Type of calling
- Tag
- Supporting language
¶ Evaluating Templates
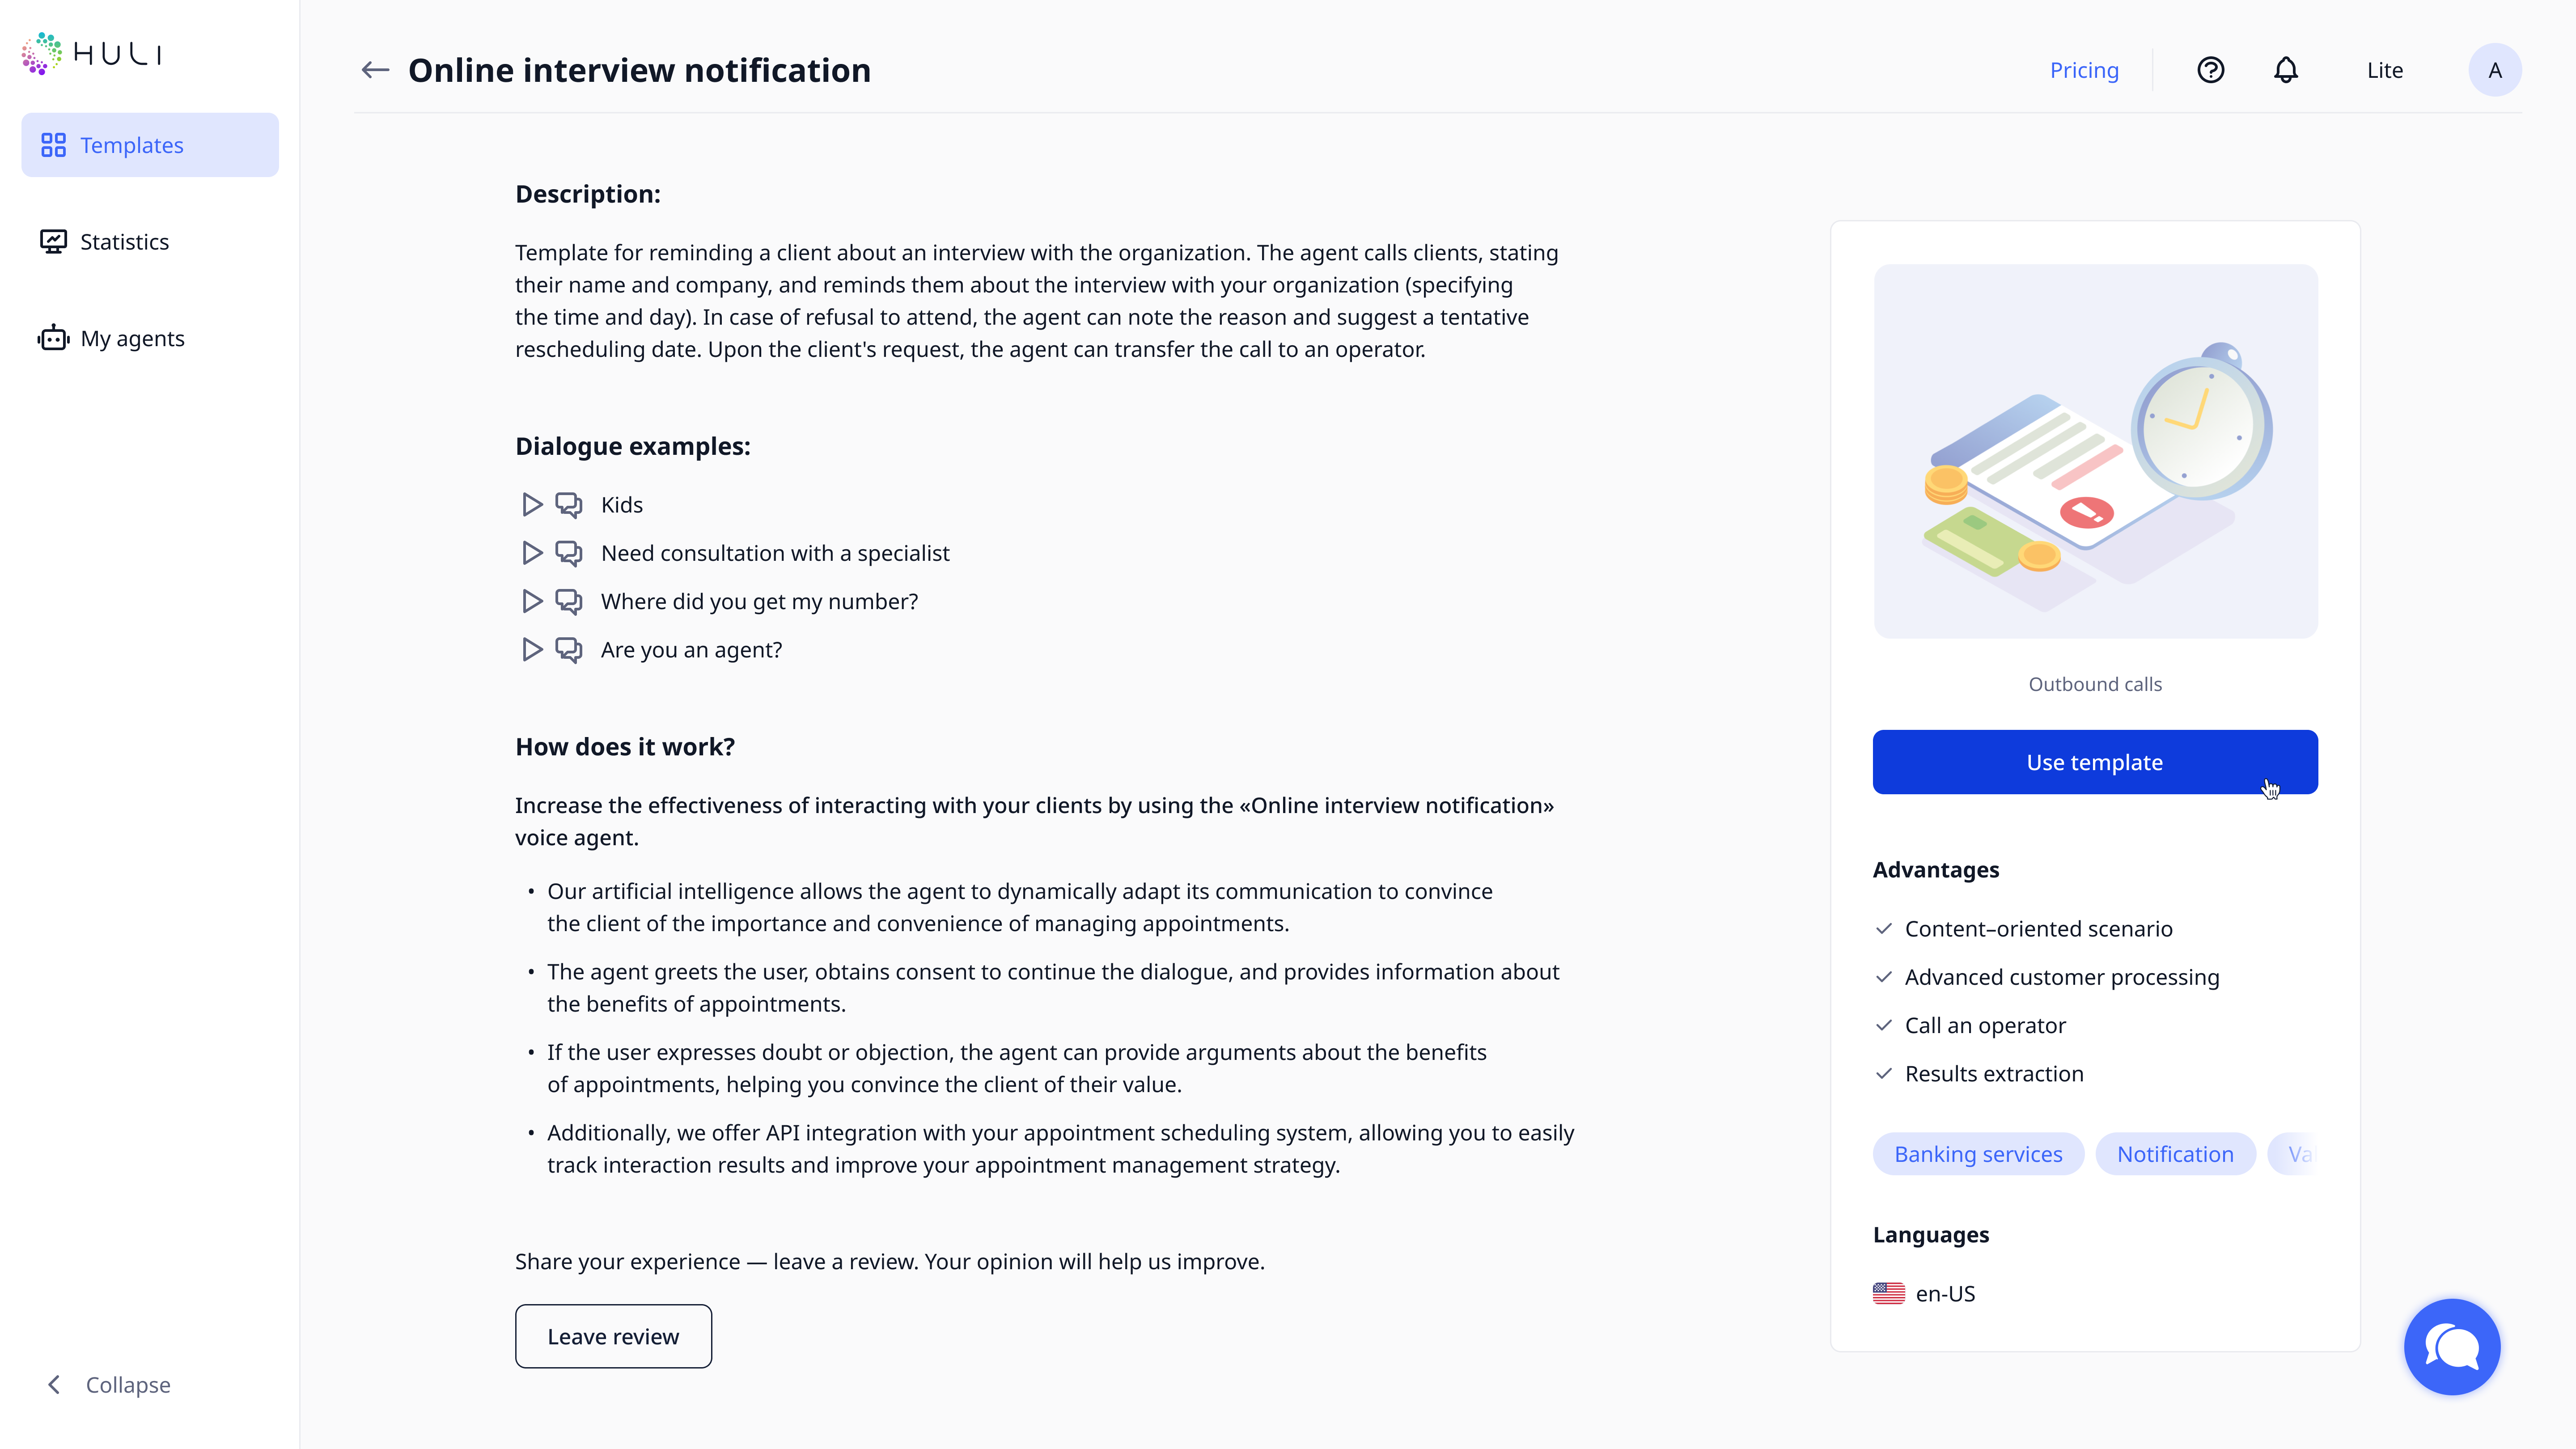
Preview Template Content:
- Click on any template card to view detailed information
- Review the template description and features
- Listen to dialogue samples to hear how the agent will sound
- Check if the template matches your business needs
Template Selection:
- Read the full template information to understand its capabilities
- Ensure the template aligns with your business requirements
- Click the "Use template" button to proceed
*If you can’t find the required template - you can use our new AI template or suggest an idea of the template.
¶ Step 2: Configure Basic Agent Settings
¶ Agent Identification
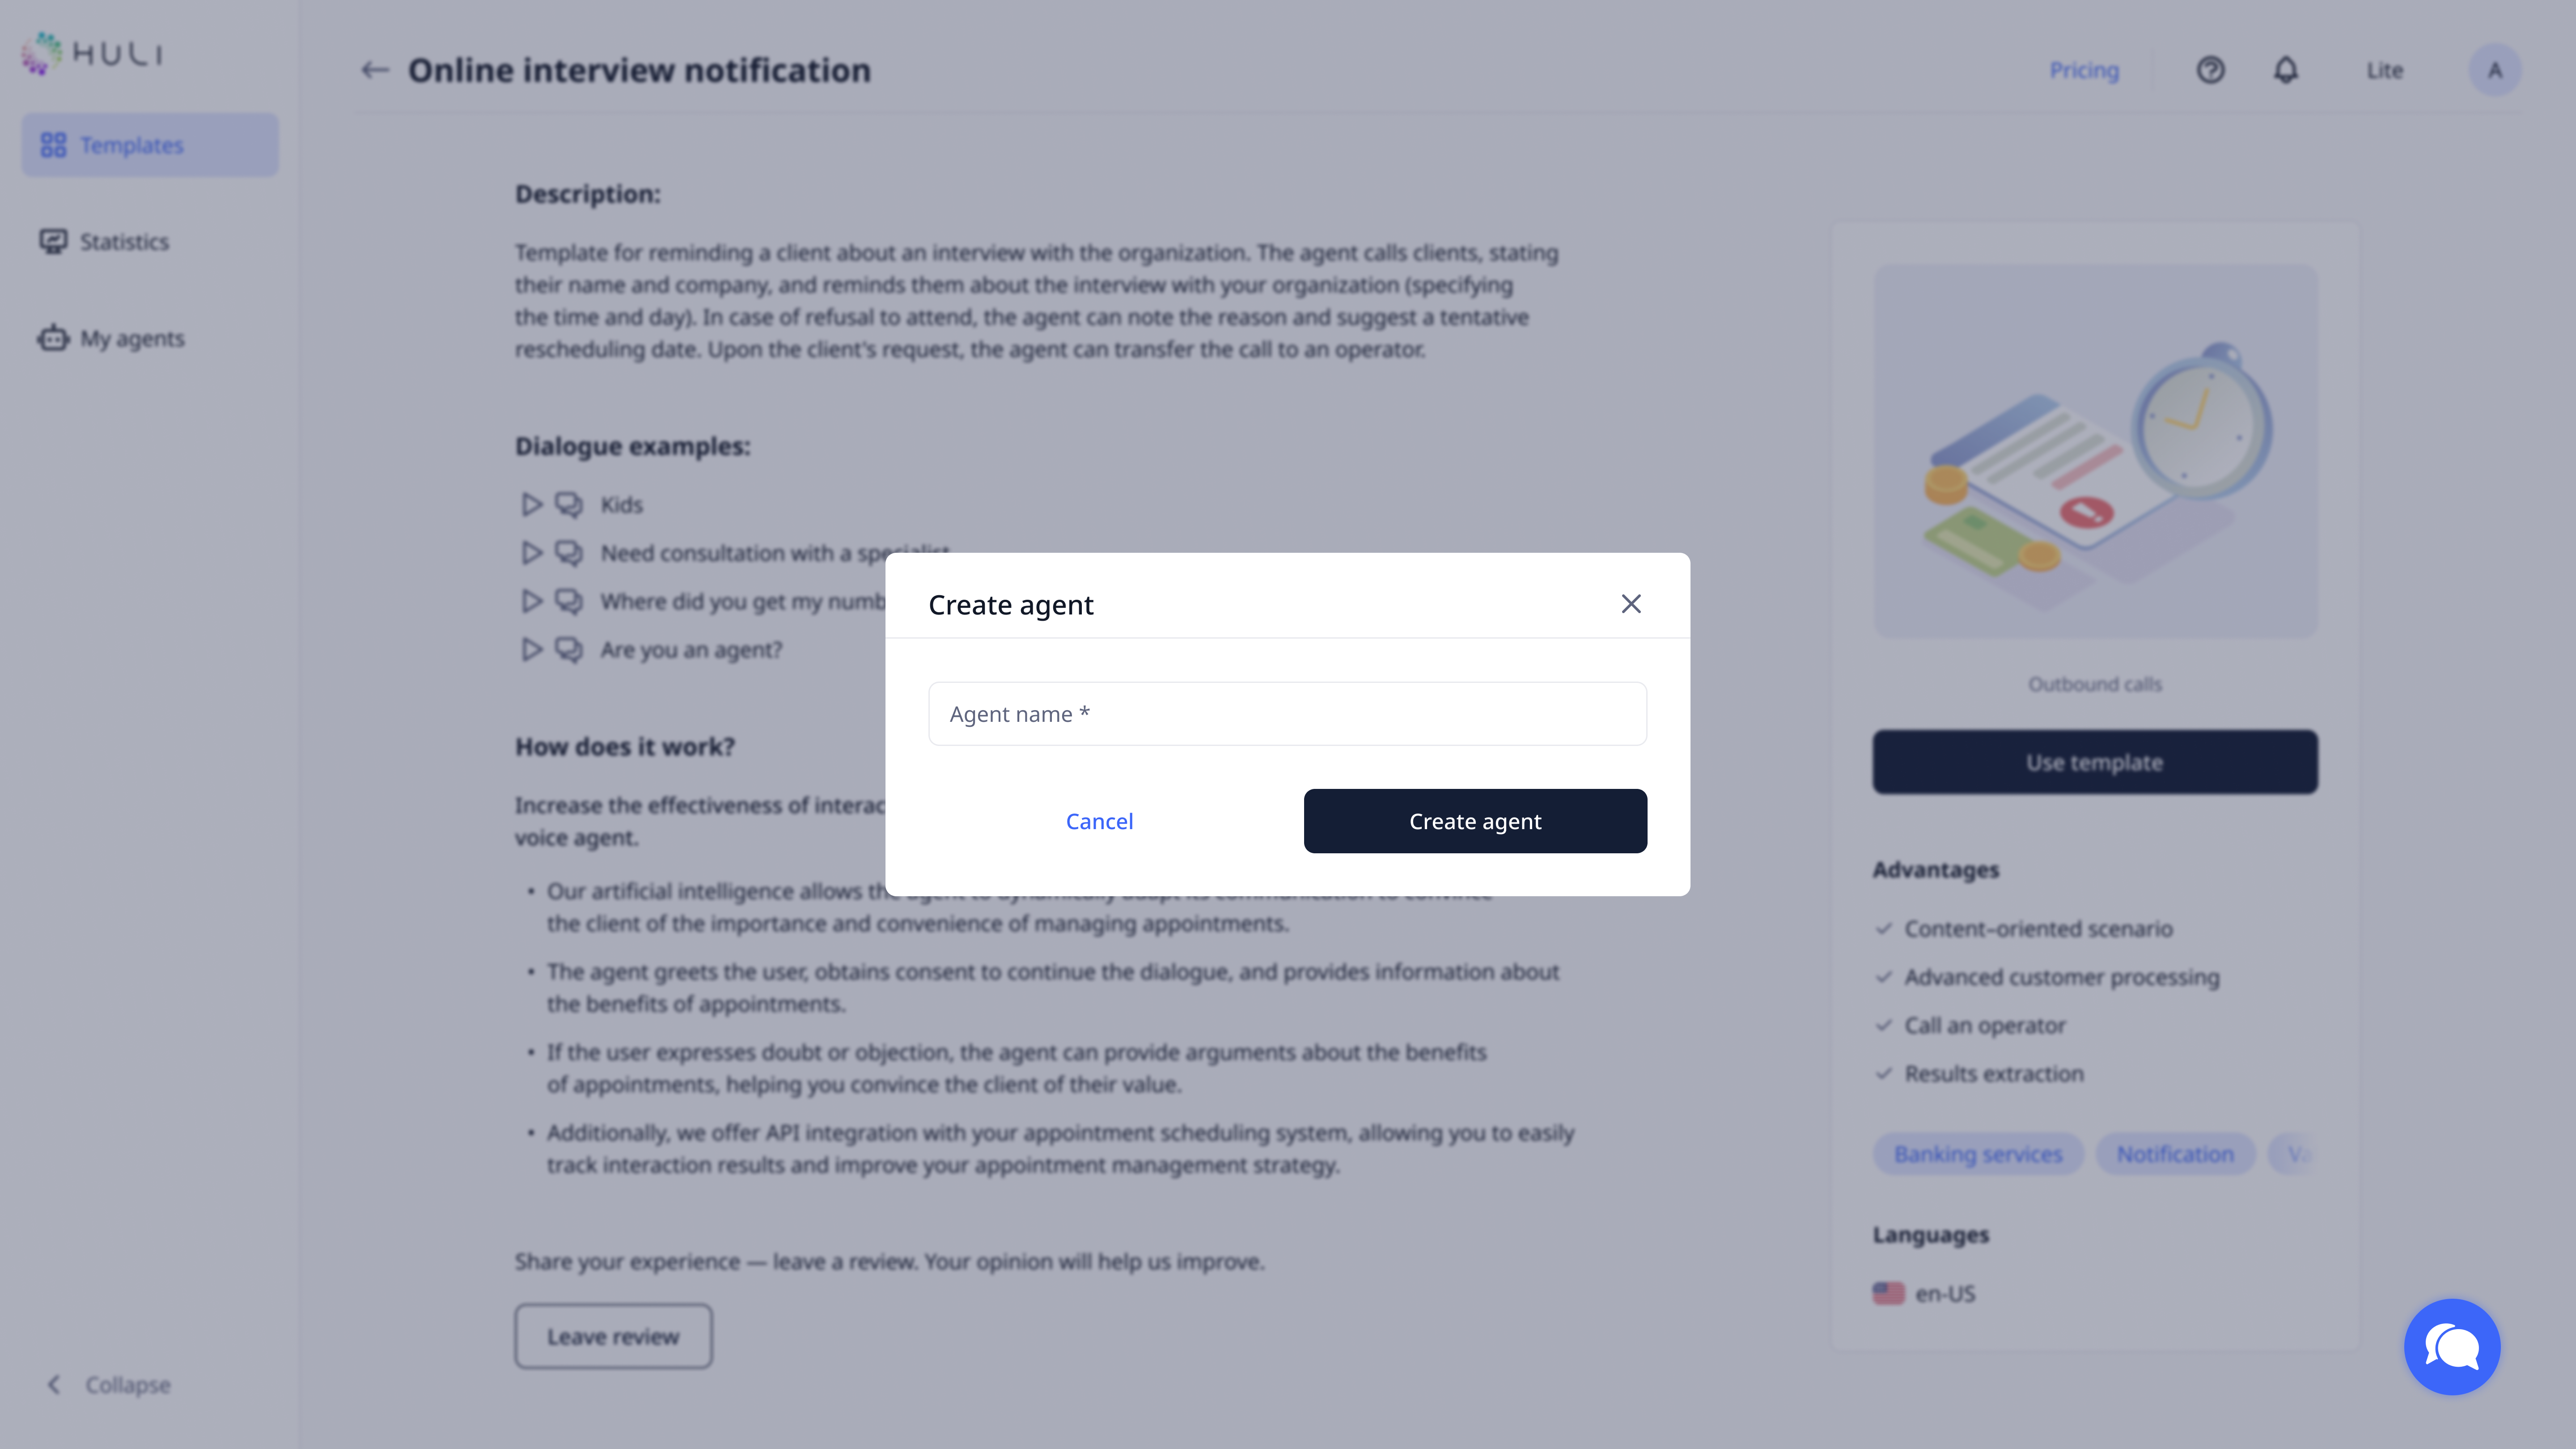
After selecting your template:
- Provide an agent name for internal identification
- This will open the main agent settings page for detailed configuration
¶ Essential Configuration
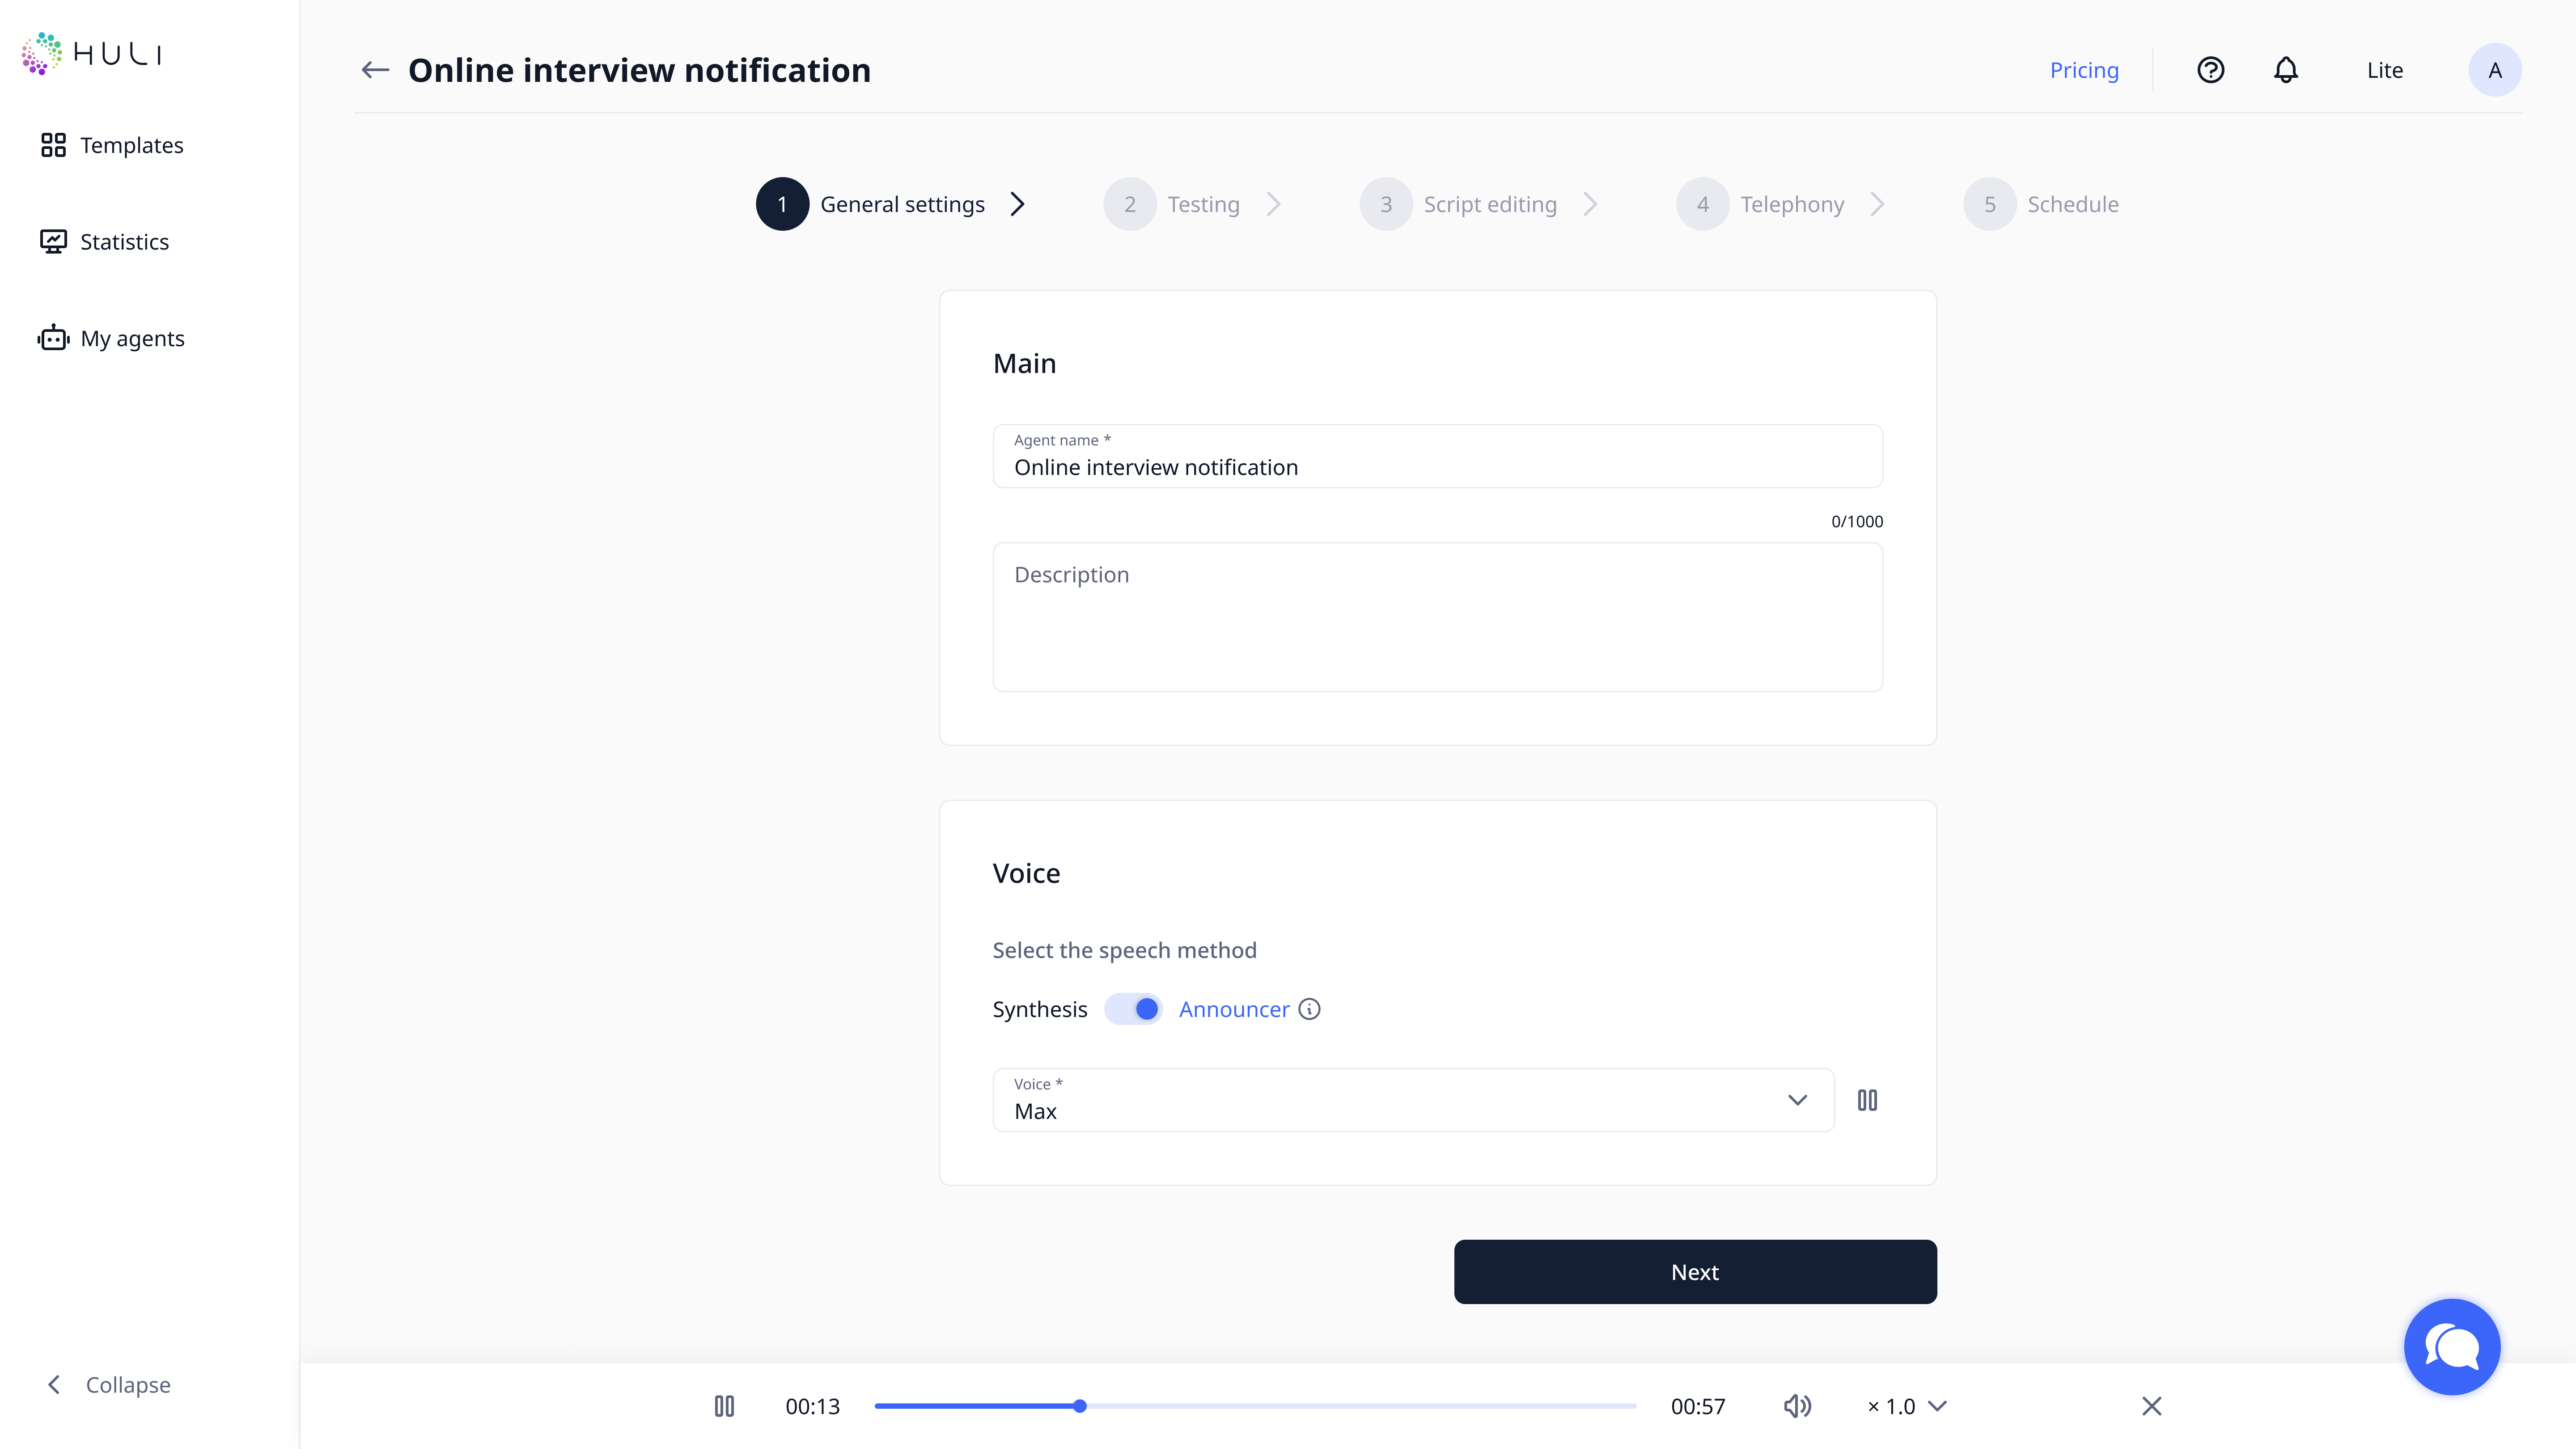
Complete the following sections:
Main Information:
- Fill in agent description (optionally)
- Set language preferences
- Configure basic interaction settings
Voice Configuration:
- Select your preferred voice type and characteristics
- Choose between AI-generated or real announcer voices
- Preview voice options before making your selection
¶ Step 3: Phone Number Verification
¶ Test Call Setup
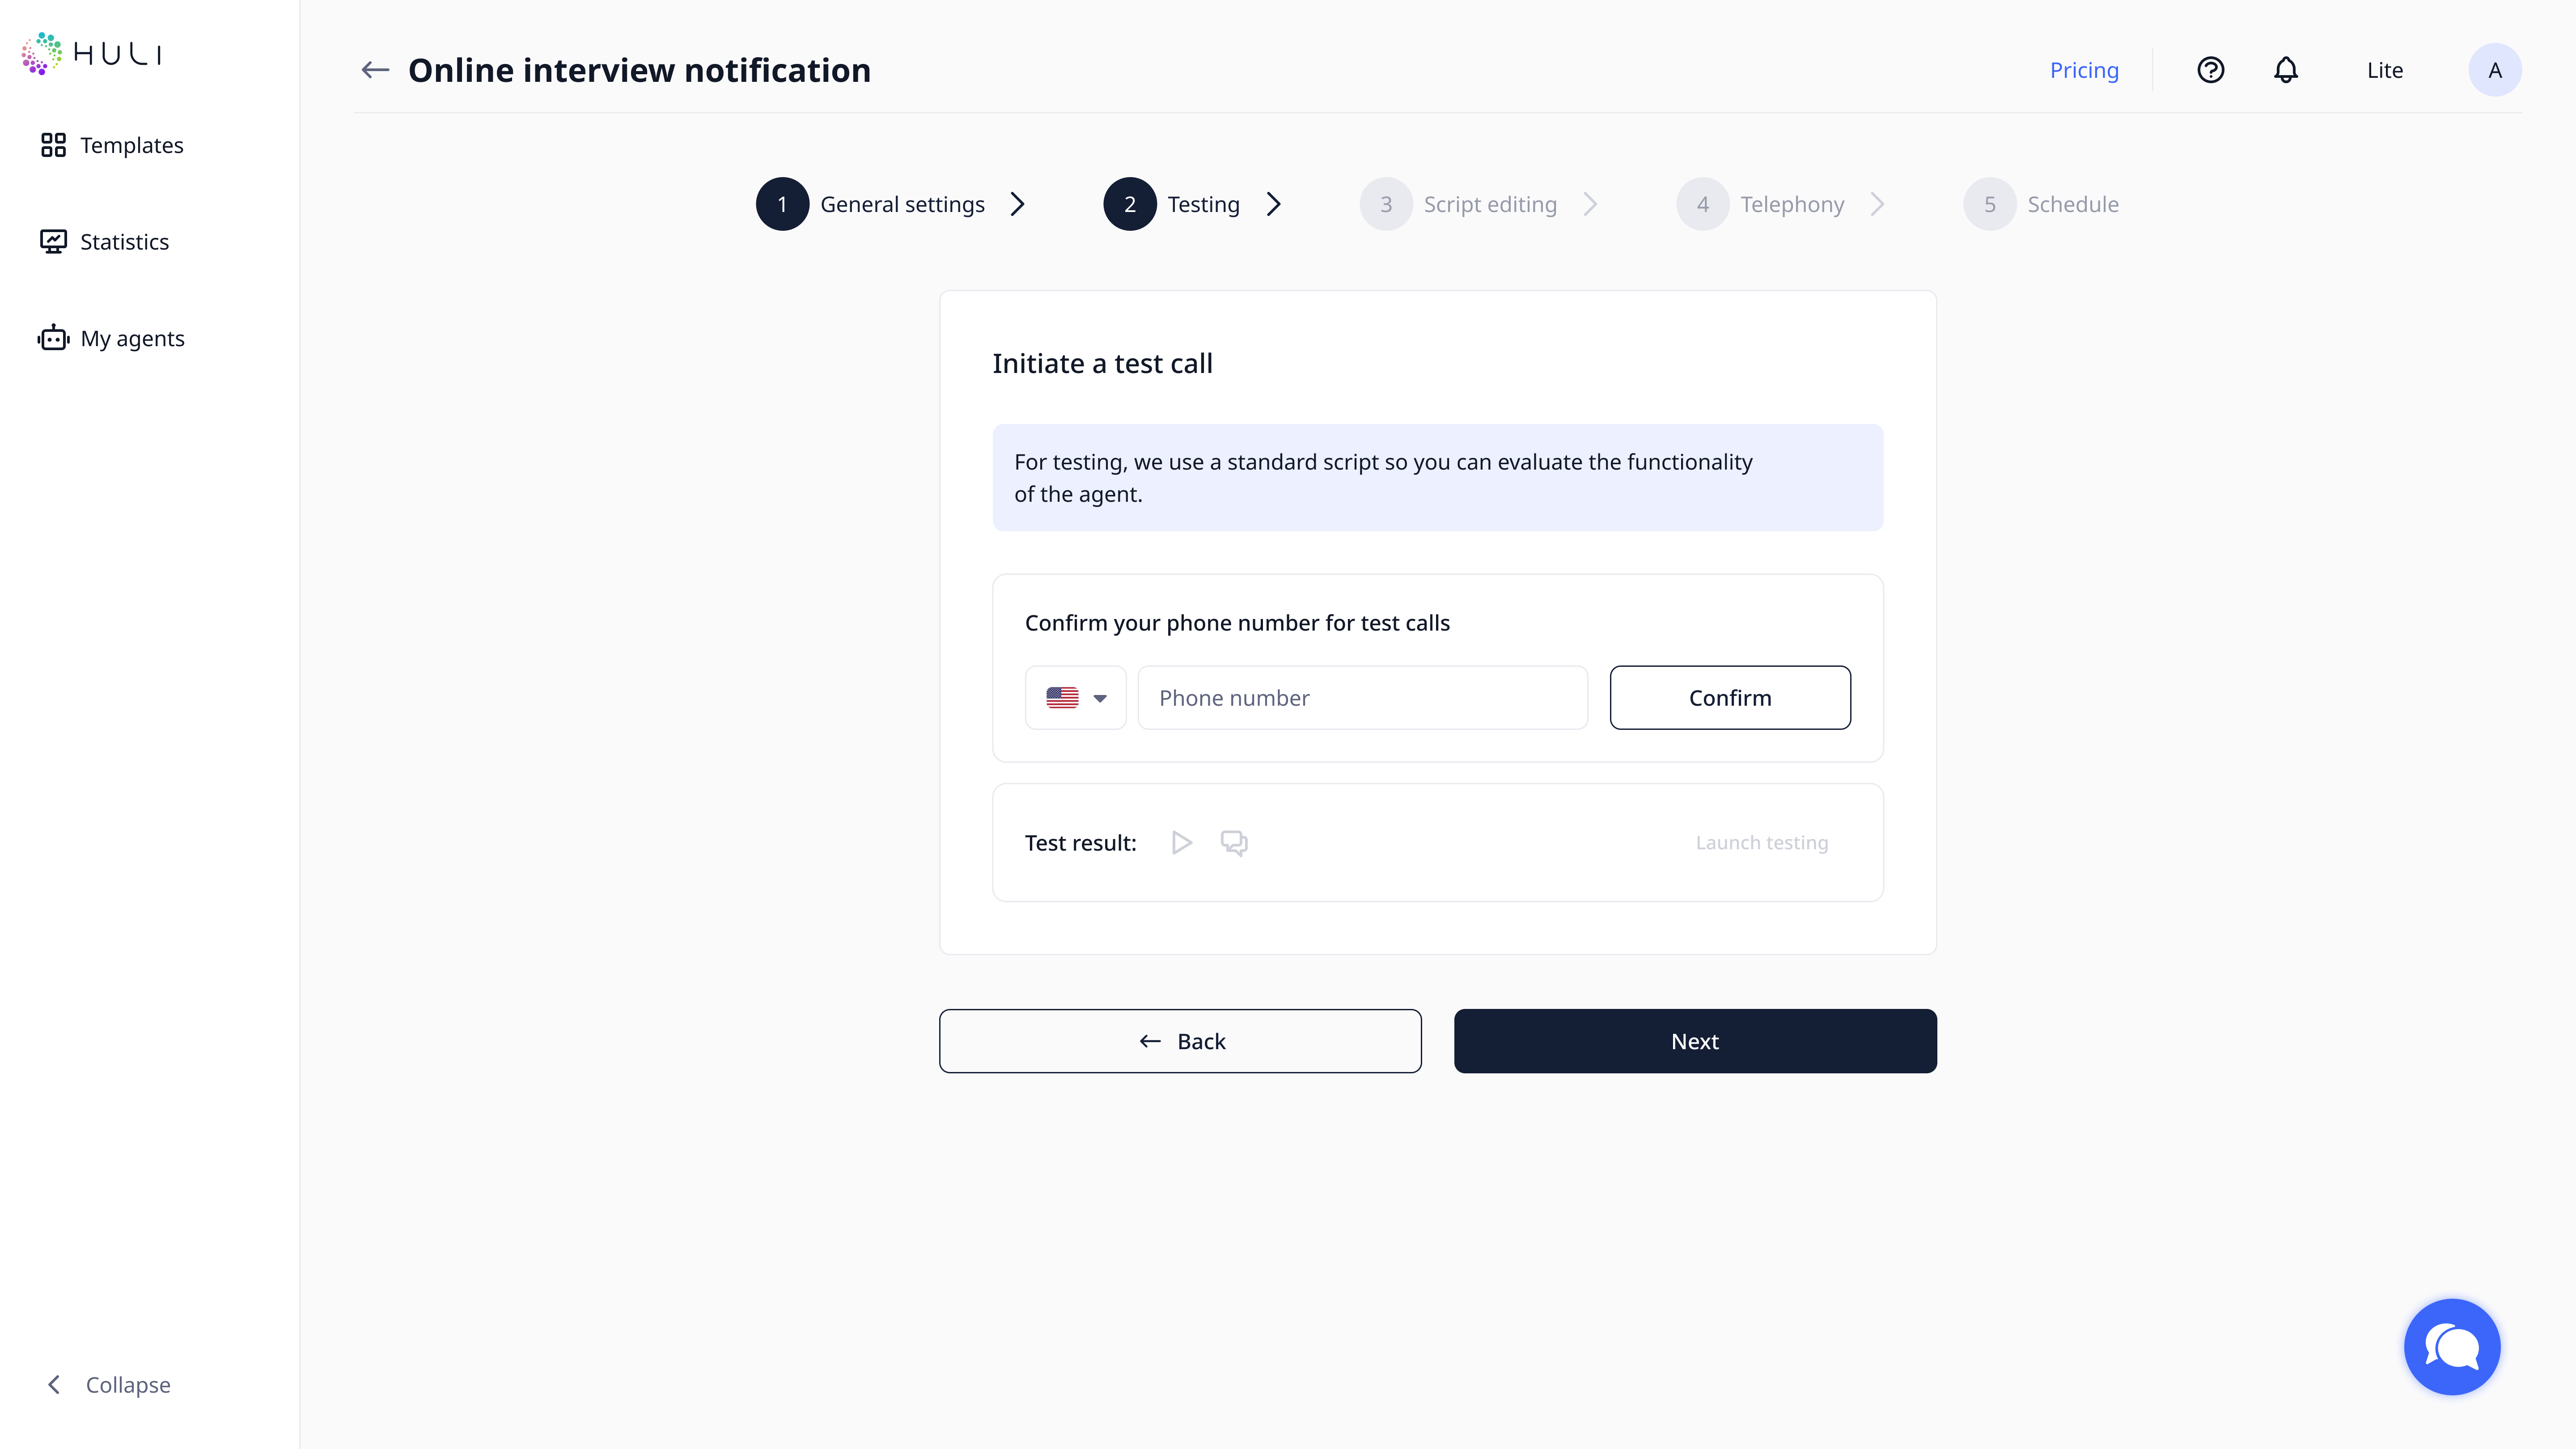
Confirm Your Phone Number:
- Enter your phone number for test call verification
- You'll receive a verification code via SMS
- Enter the code in the confirmation window that appears
- This number will be used for testing your agent's functionality
After the setup you are ready to test your agent.
¶ Step 4: Customize Your Script
¶ Personalization
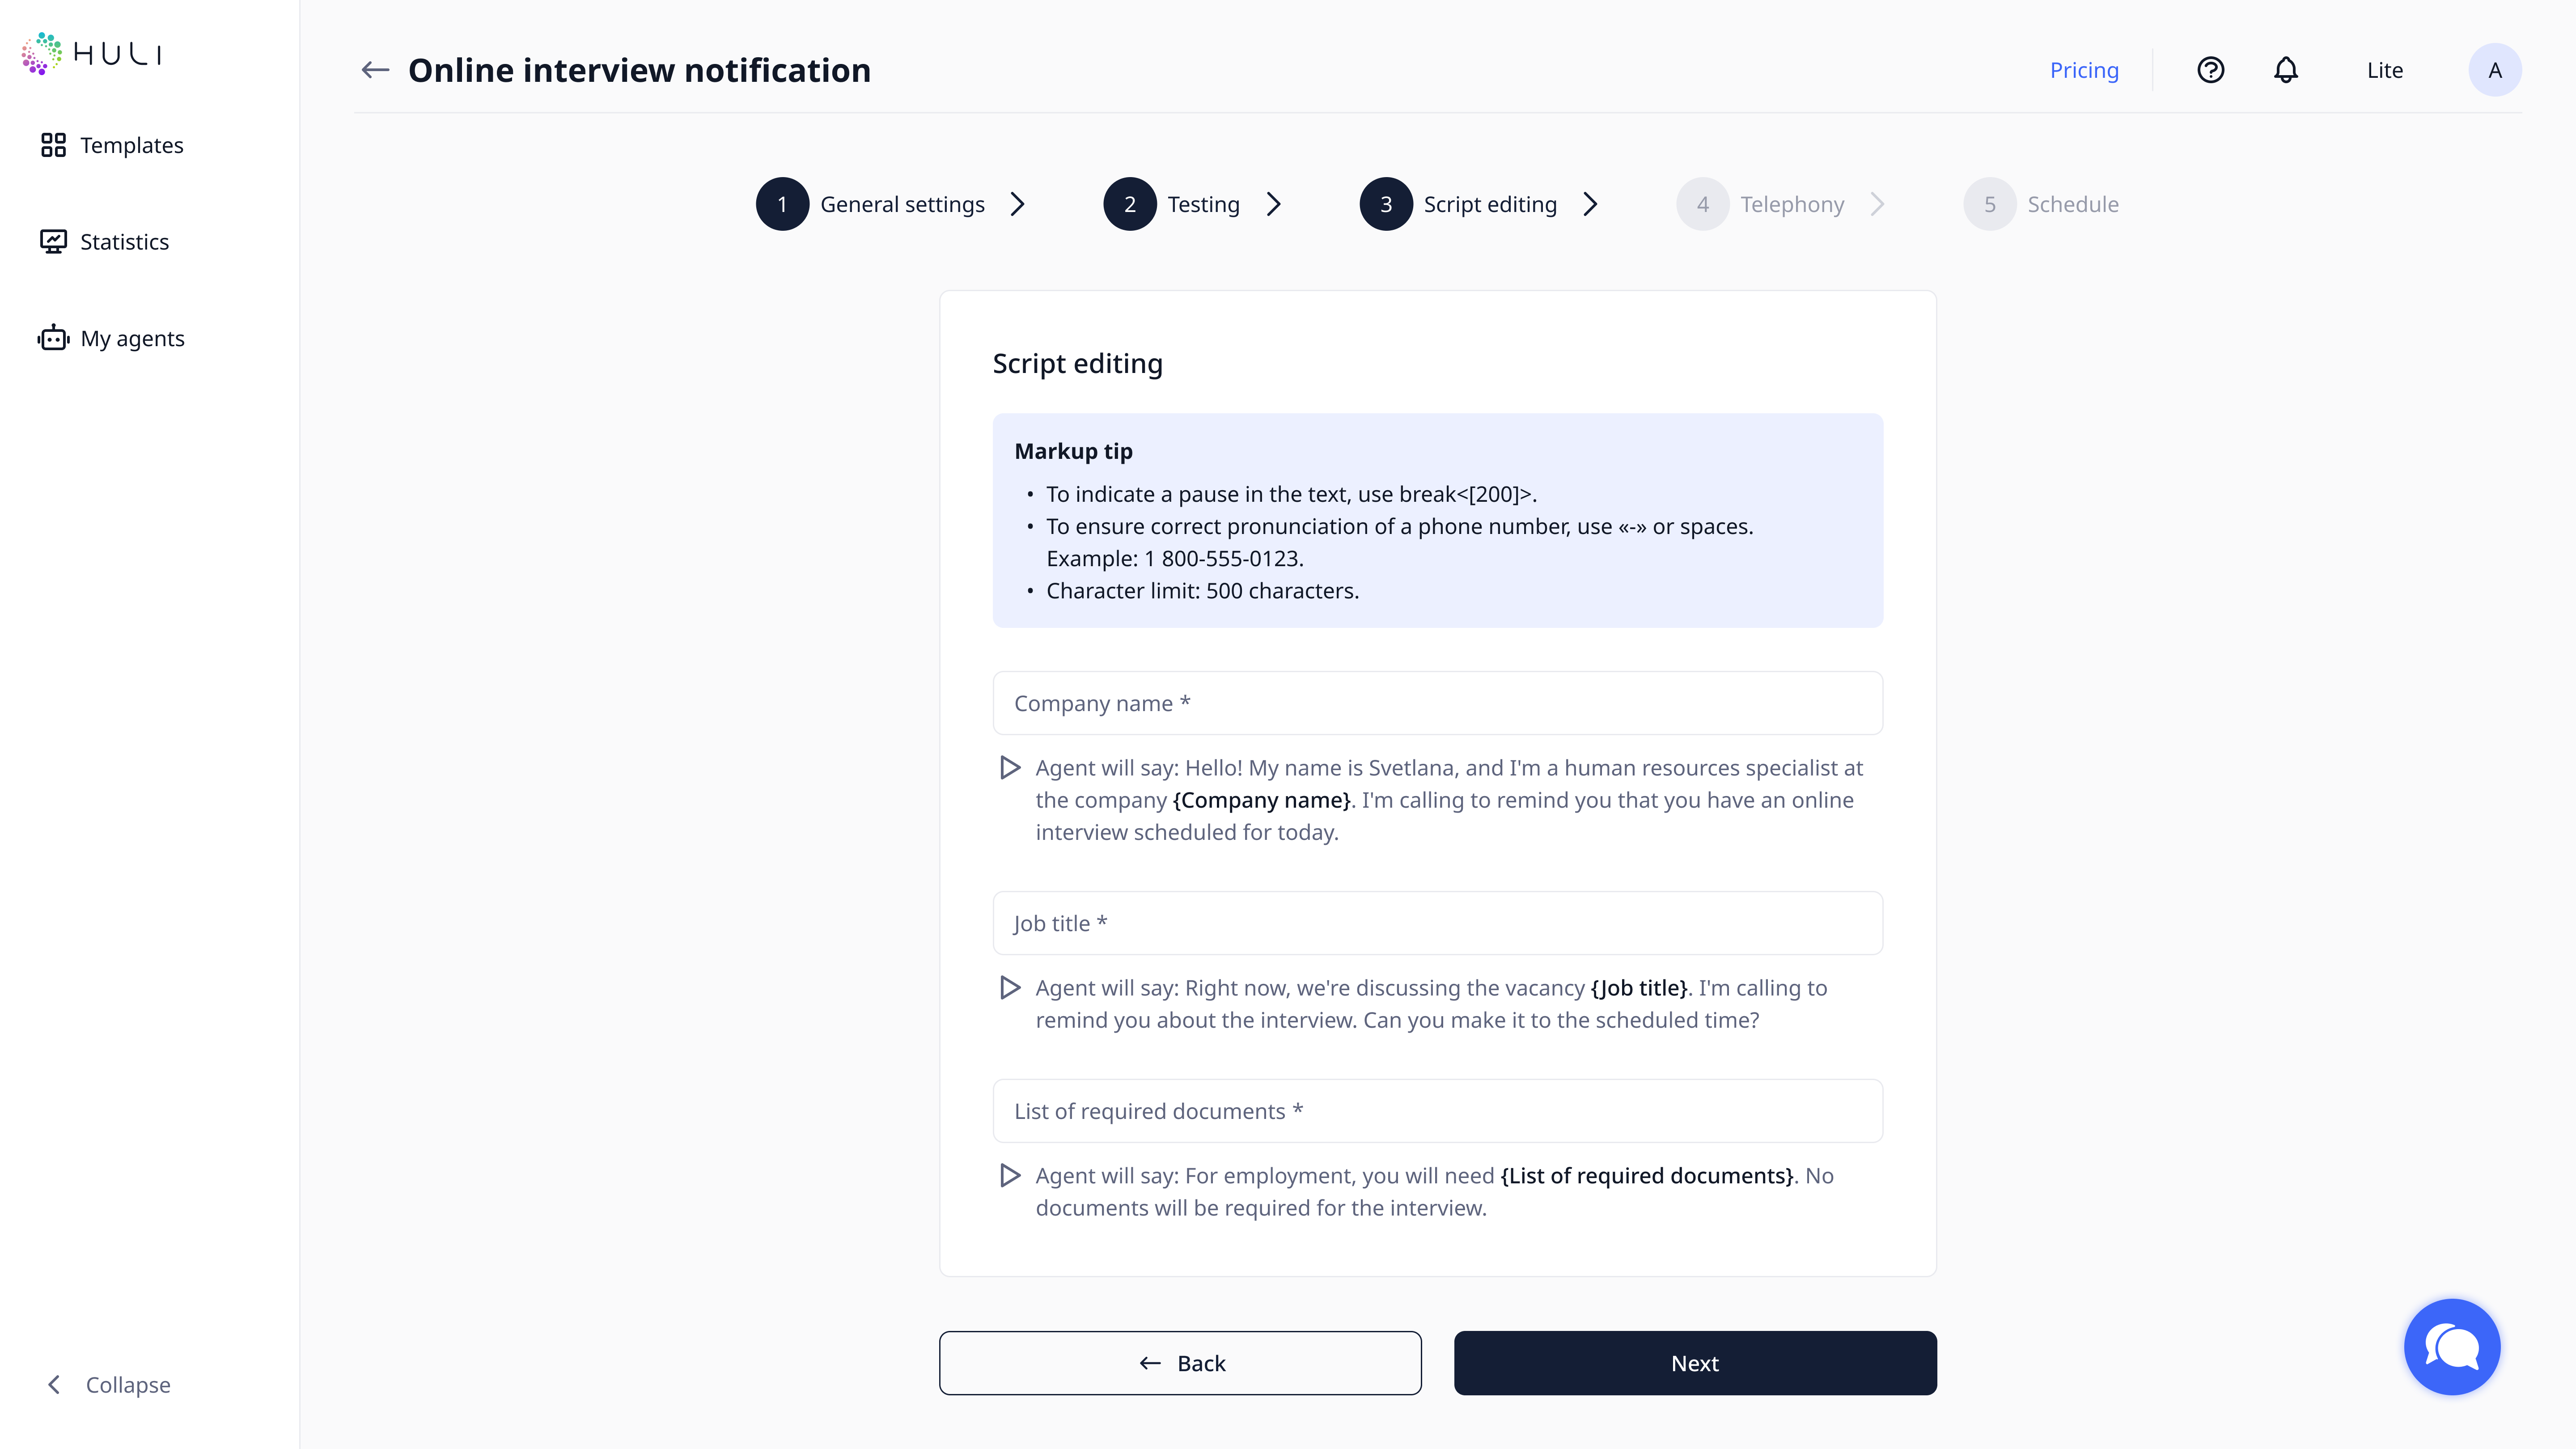
Edit template content to match your business and call purposes.
¶ Step 5: Voice Production (If Using Real Announcer)
¶ Announcer Task Management
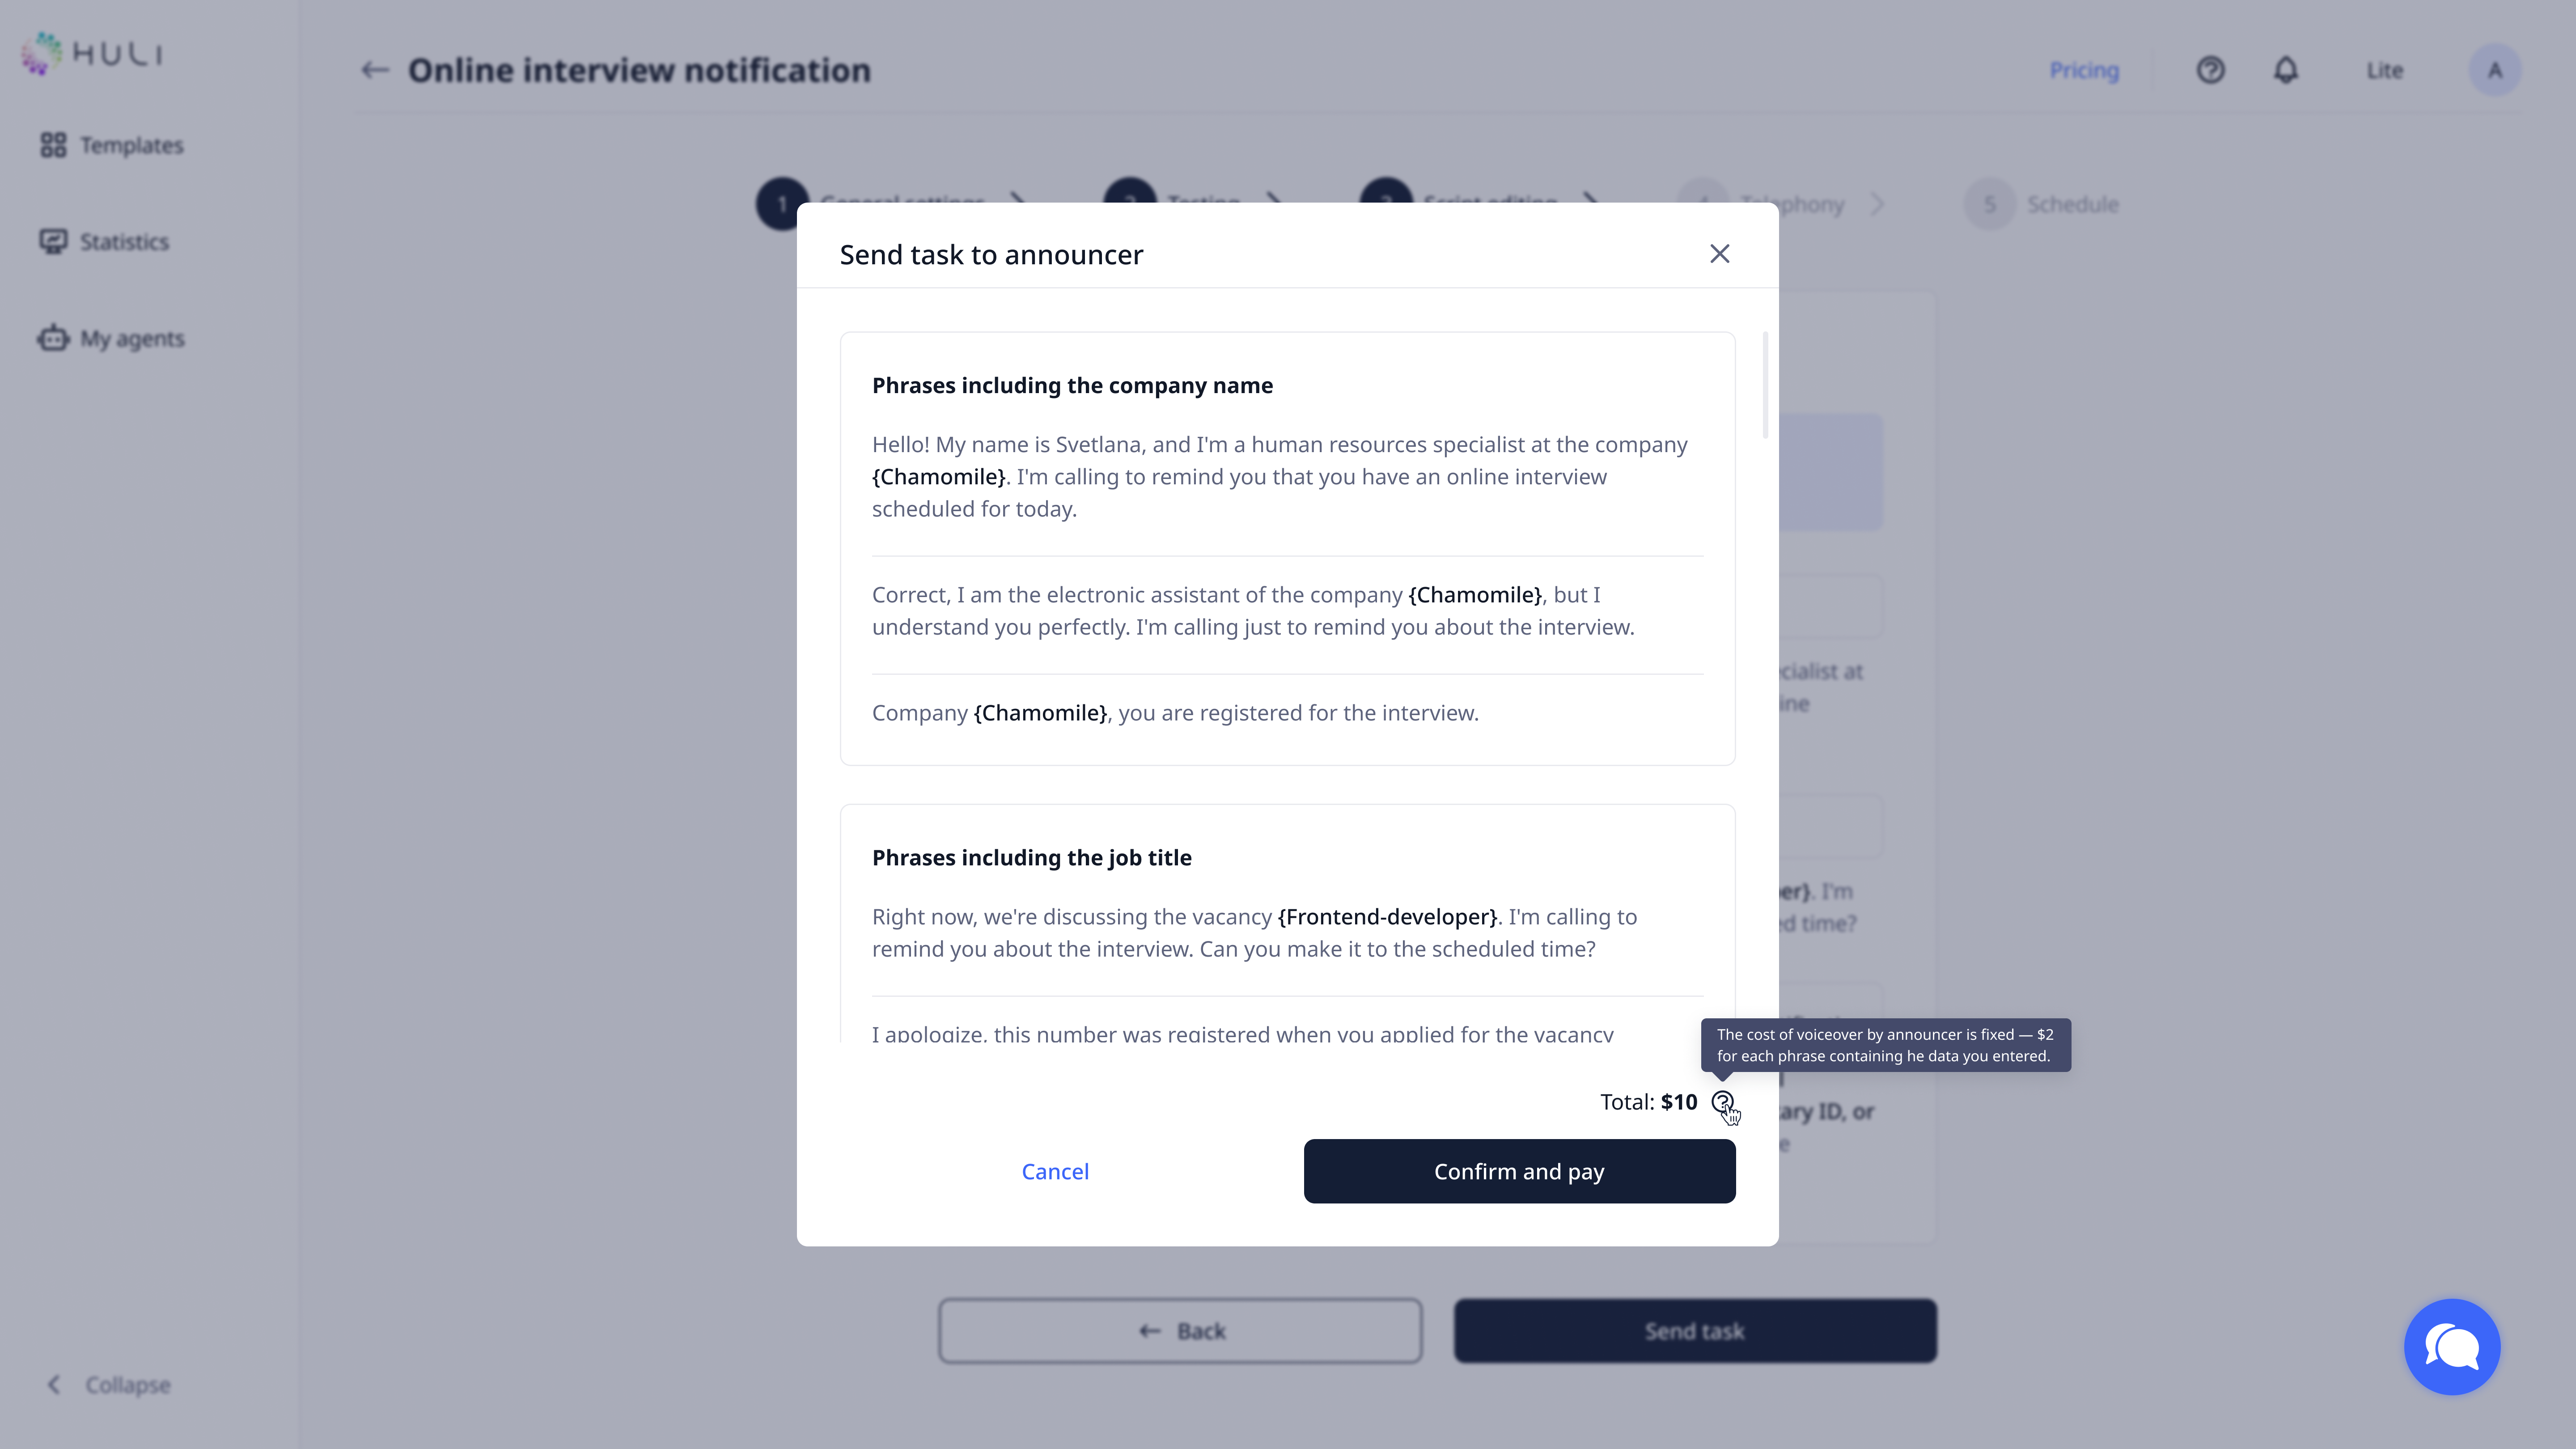
For Real Announcer Voices:
- After completing your template customization, you need to confirm task to the announcer and pay for it. You can go to paying page from the task from Agent's Creation or pay for it from Settings. (Paying available only for Owner and Billing Manager roles)
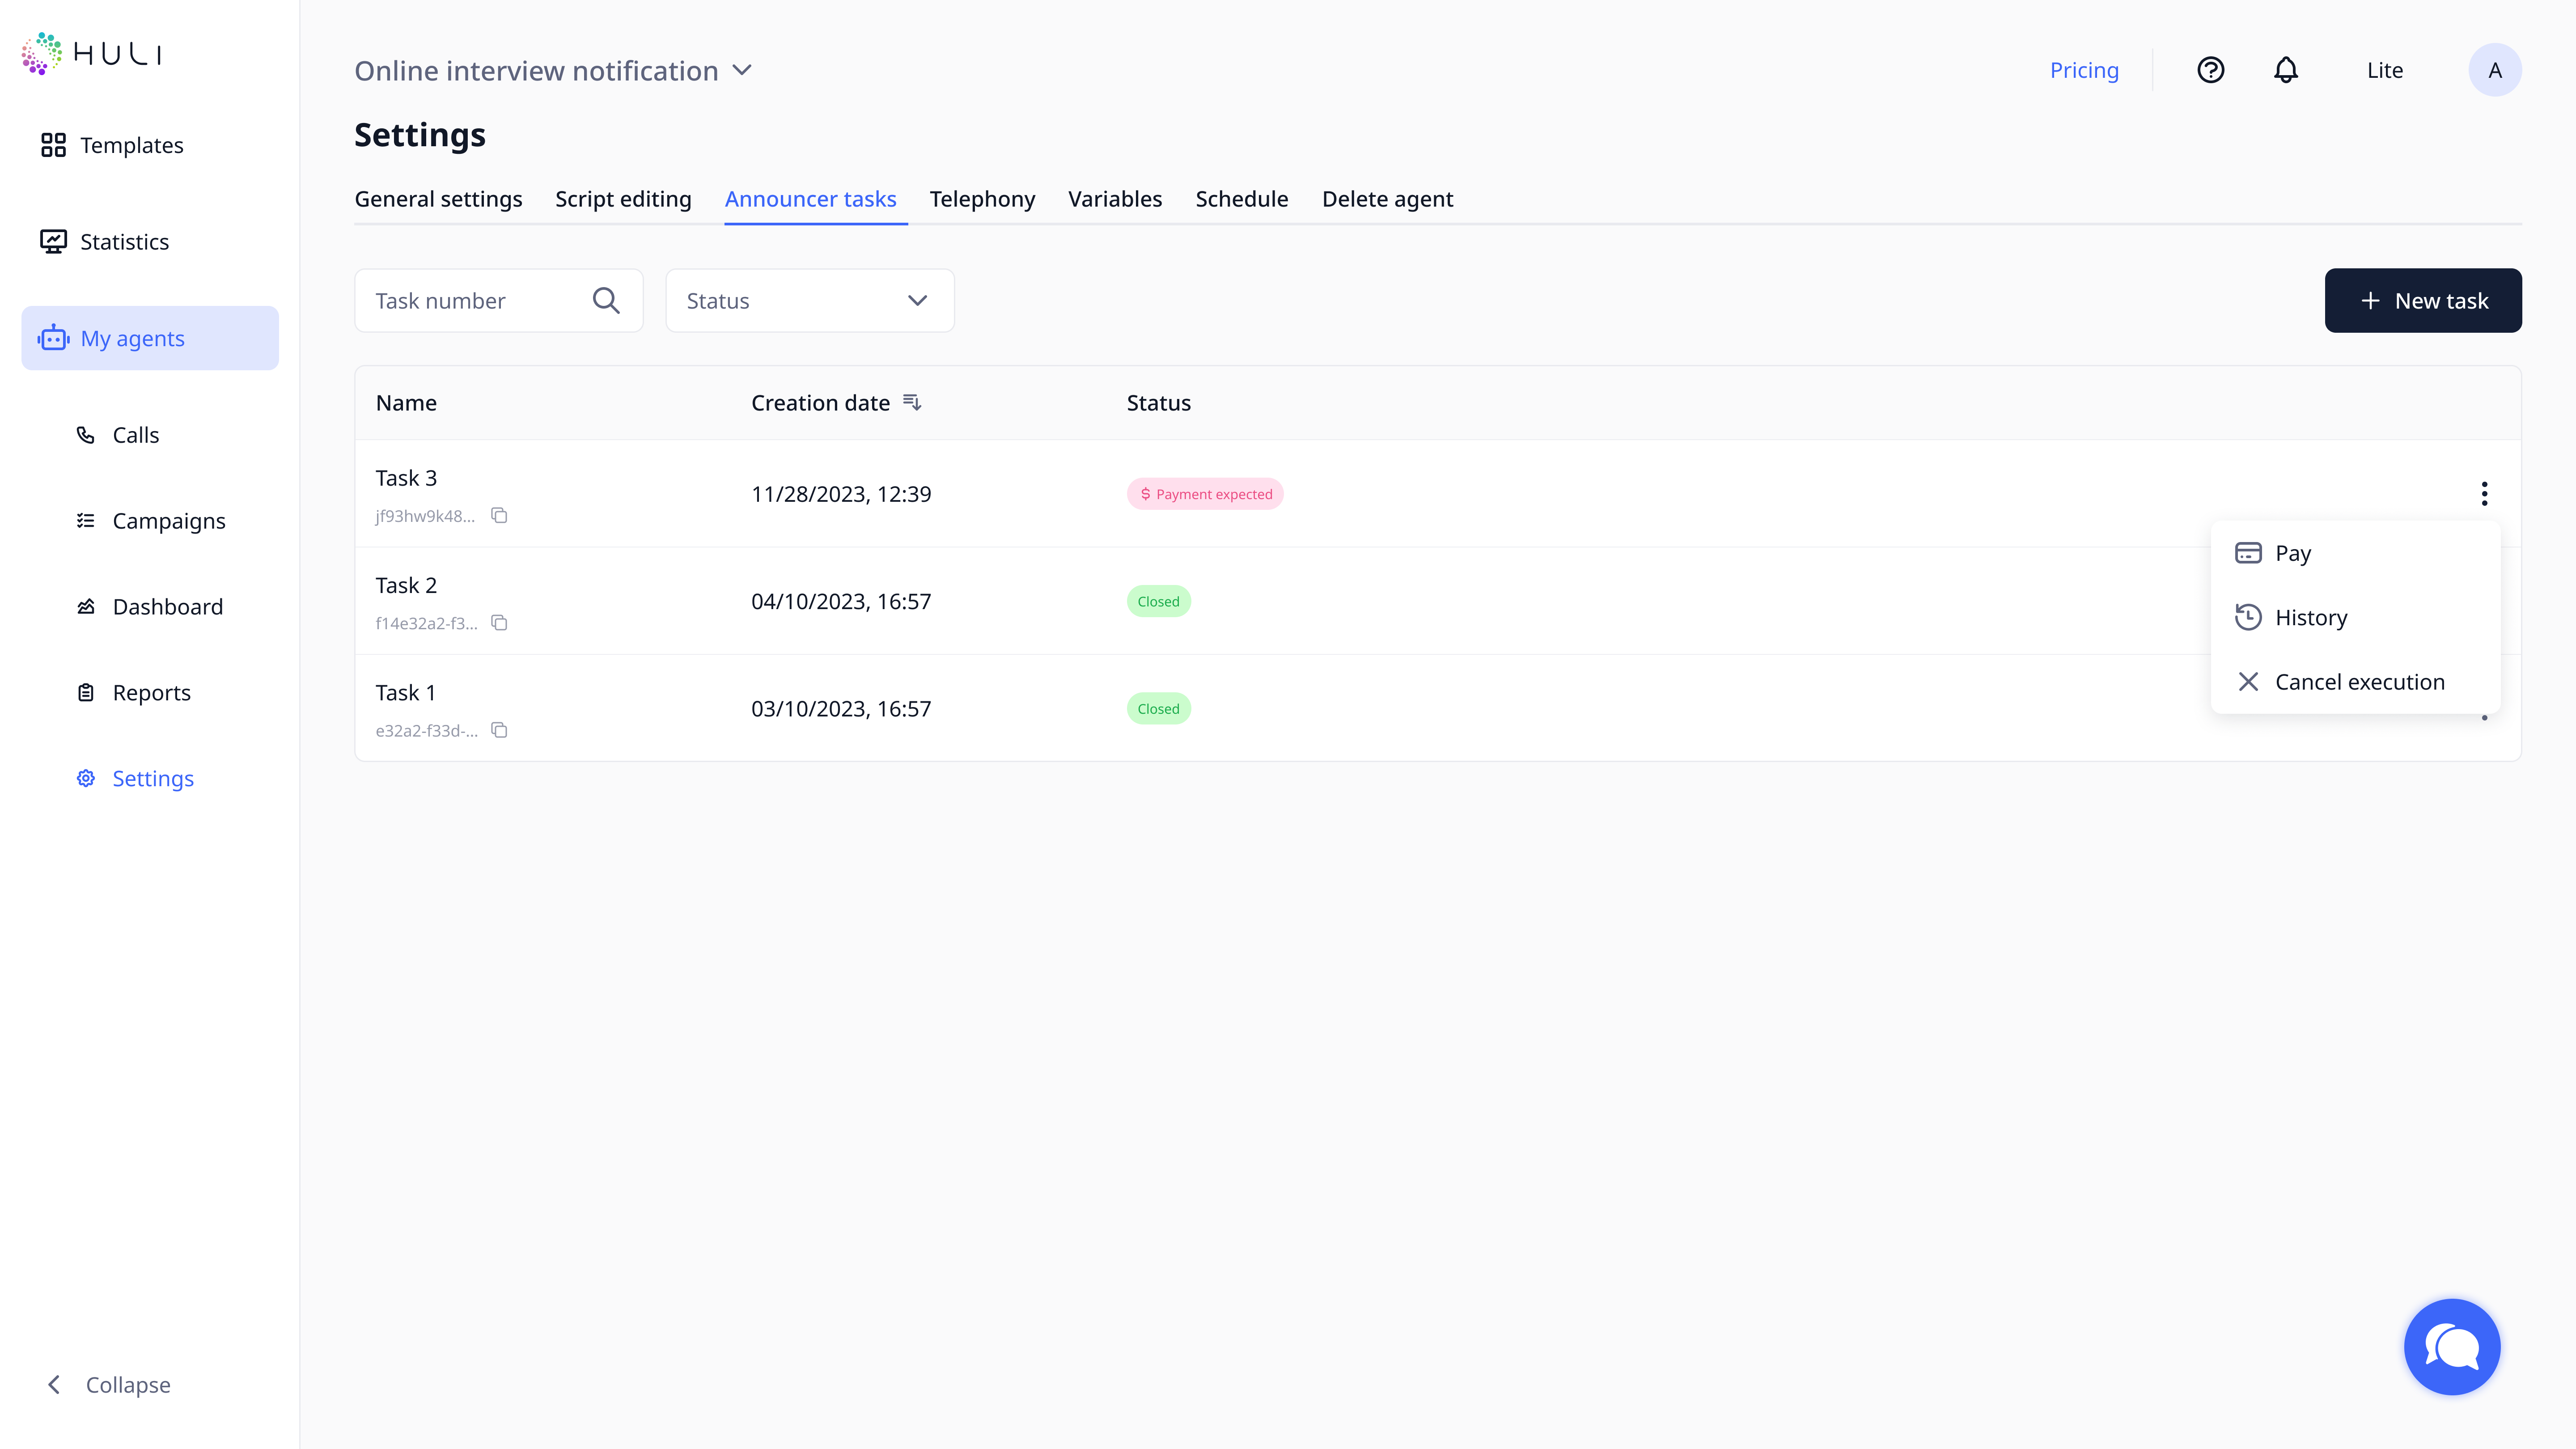
- Navigate to page My agents > Agent name > Settings > Announcer Tasks
- Complete payment for the voice production service (Paying available only for Owner and Billing Manager roles)
- Production timeline: 3 business days after payment confirmation
Important notes:
- Real announcer voices provide professional, human-like quality
- Payment is required before production begins
- You cannot launch campaigns until announcer tasks are completed
¶ Step 6: Telephony Configuration
¶ Choose Your Phone Service
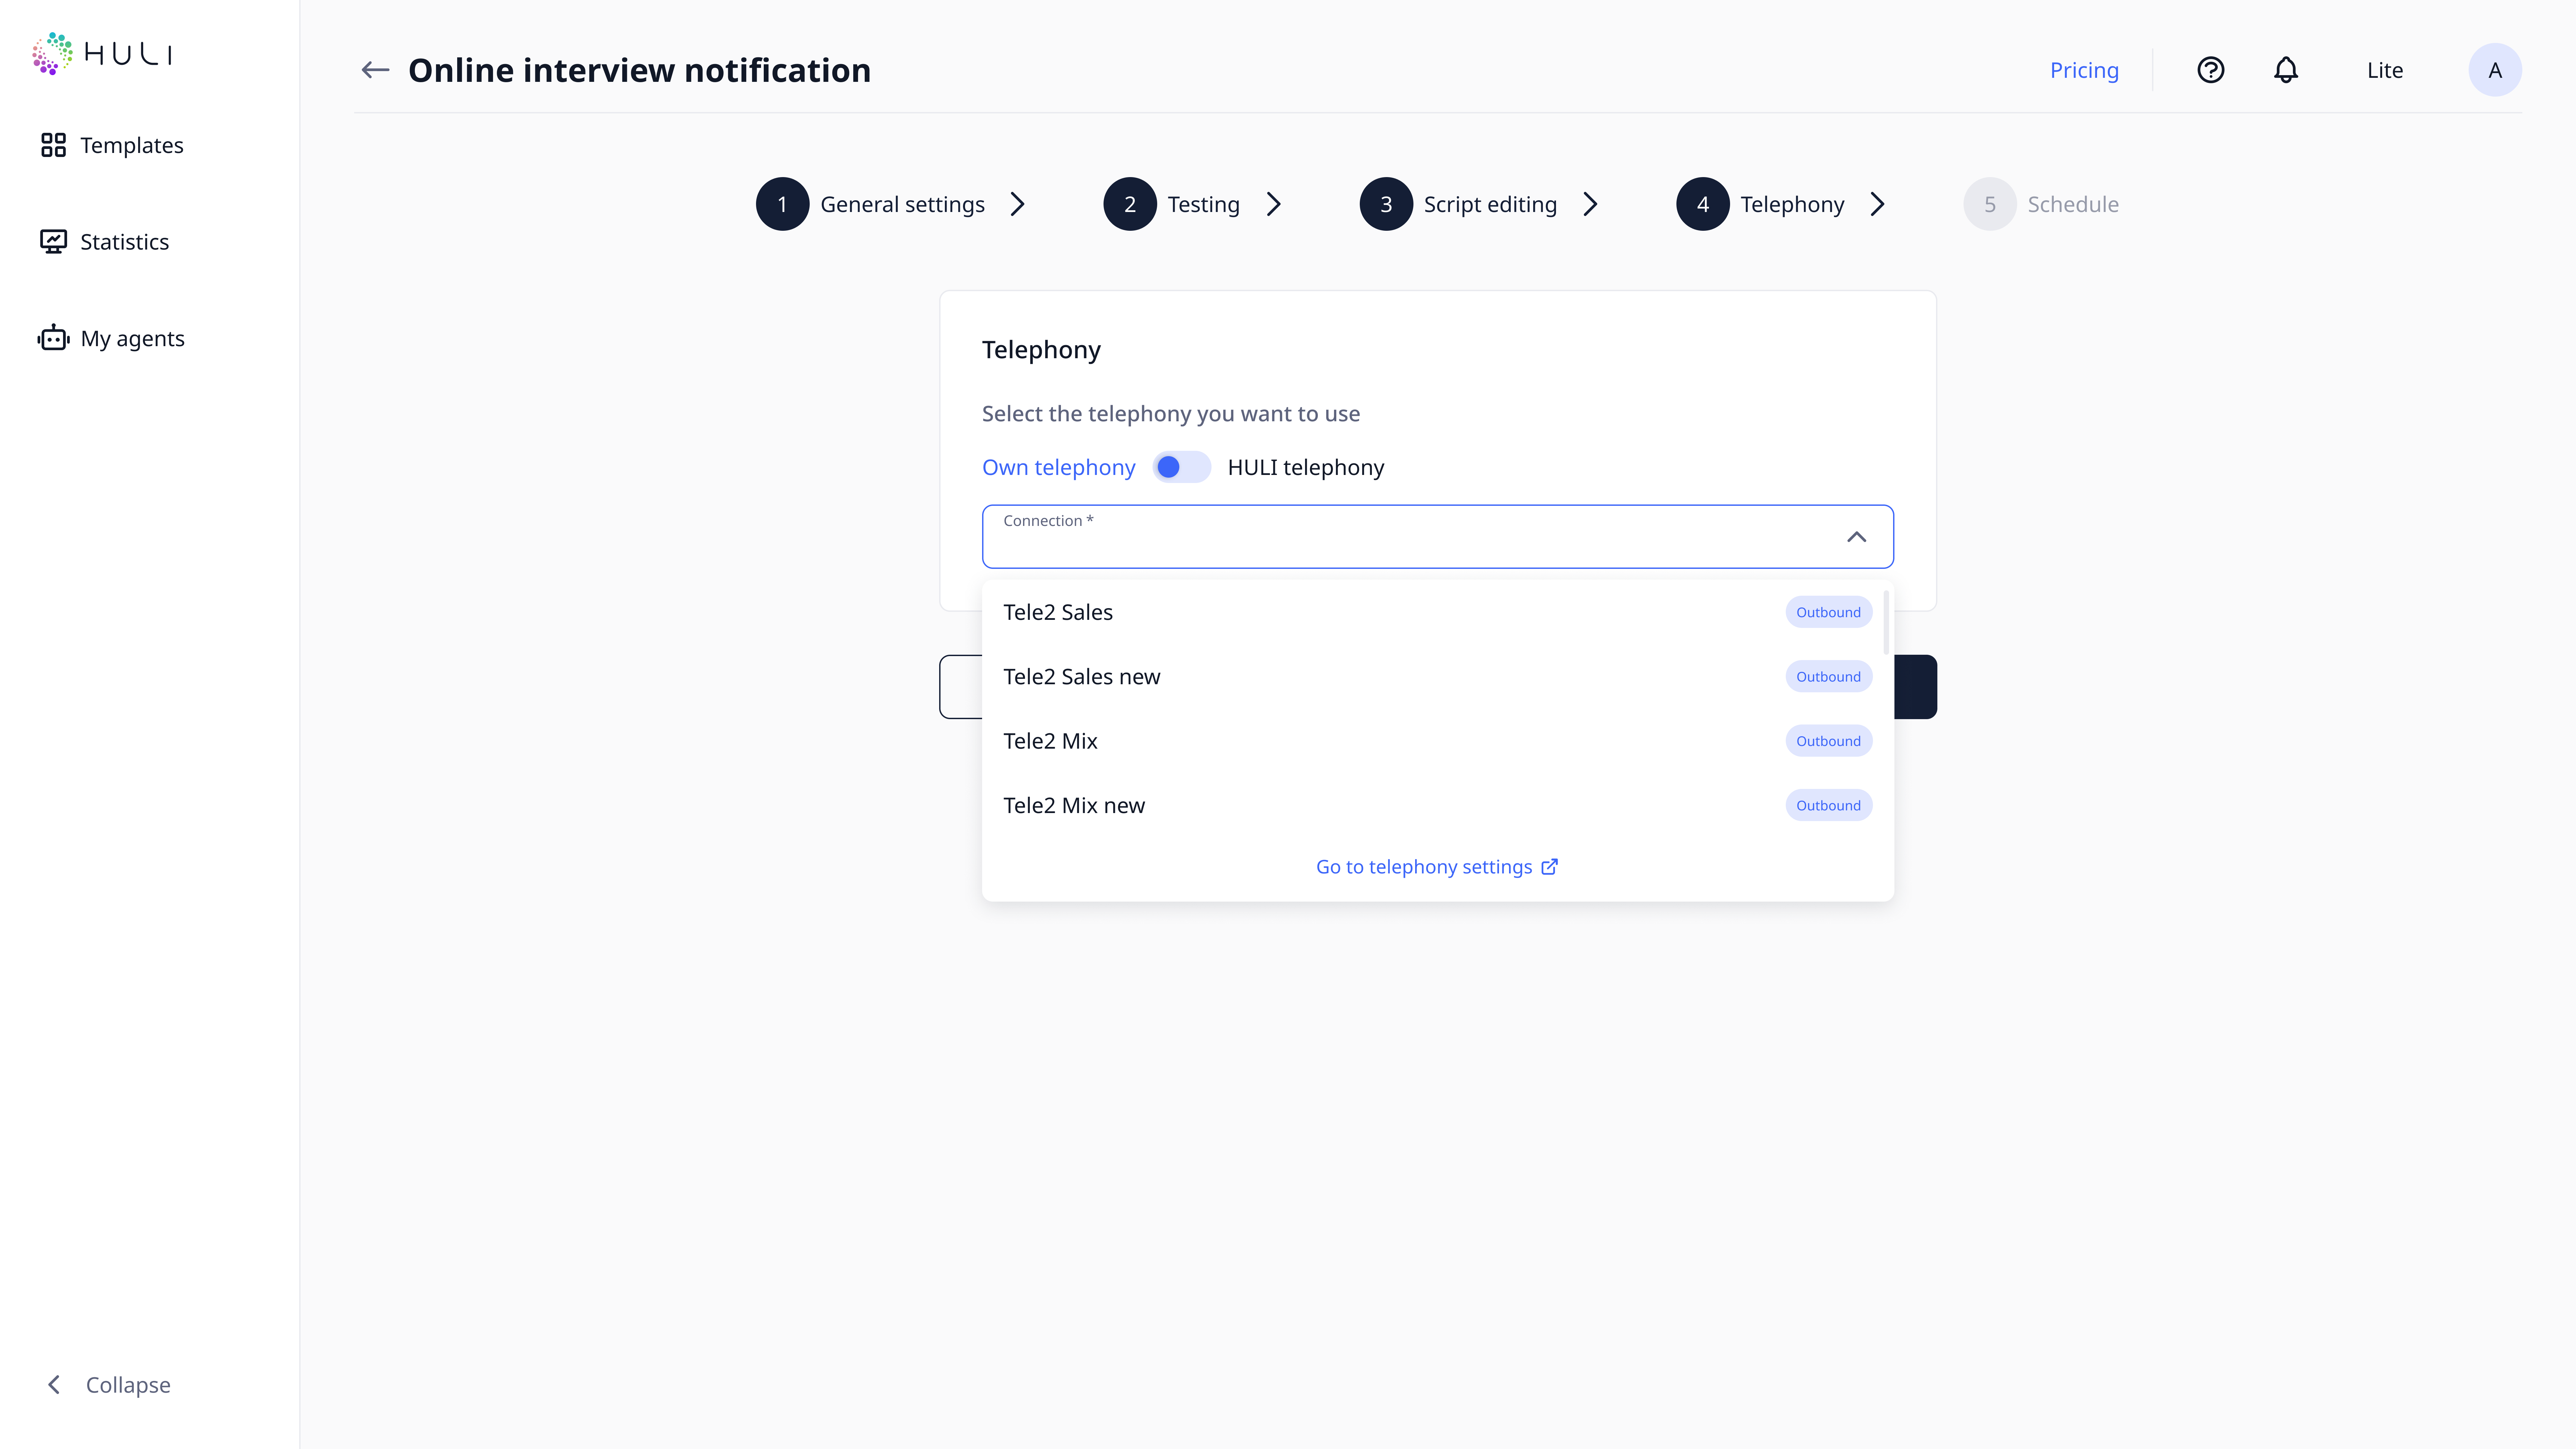
Option 1: External Telephony (Your Own System)
- Configure your existing phone system details
- Go to Telephony Settings to enter connection information
- Select your configured telephony from the agent's telephony list
Option 2: HULI Telephony (Integrated Service)
- Available only on paid plans that include HULI telephony
- Provides seamless integration without external setup
¶ Telephony Setup Process
- Decide which telephony option suits your needs
- If using external telephony, complete the technical configuration first
- Return to your agent settings to select the appropriate telephony service
¶ Step 7: Operational Settings
¶ Configure Working Parameters
Set Up Call Management:
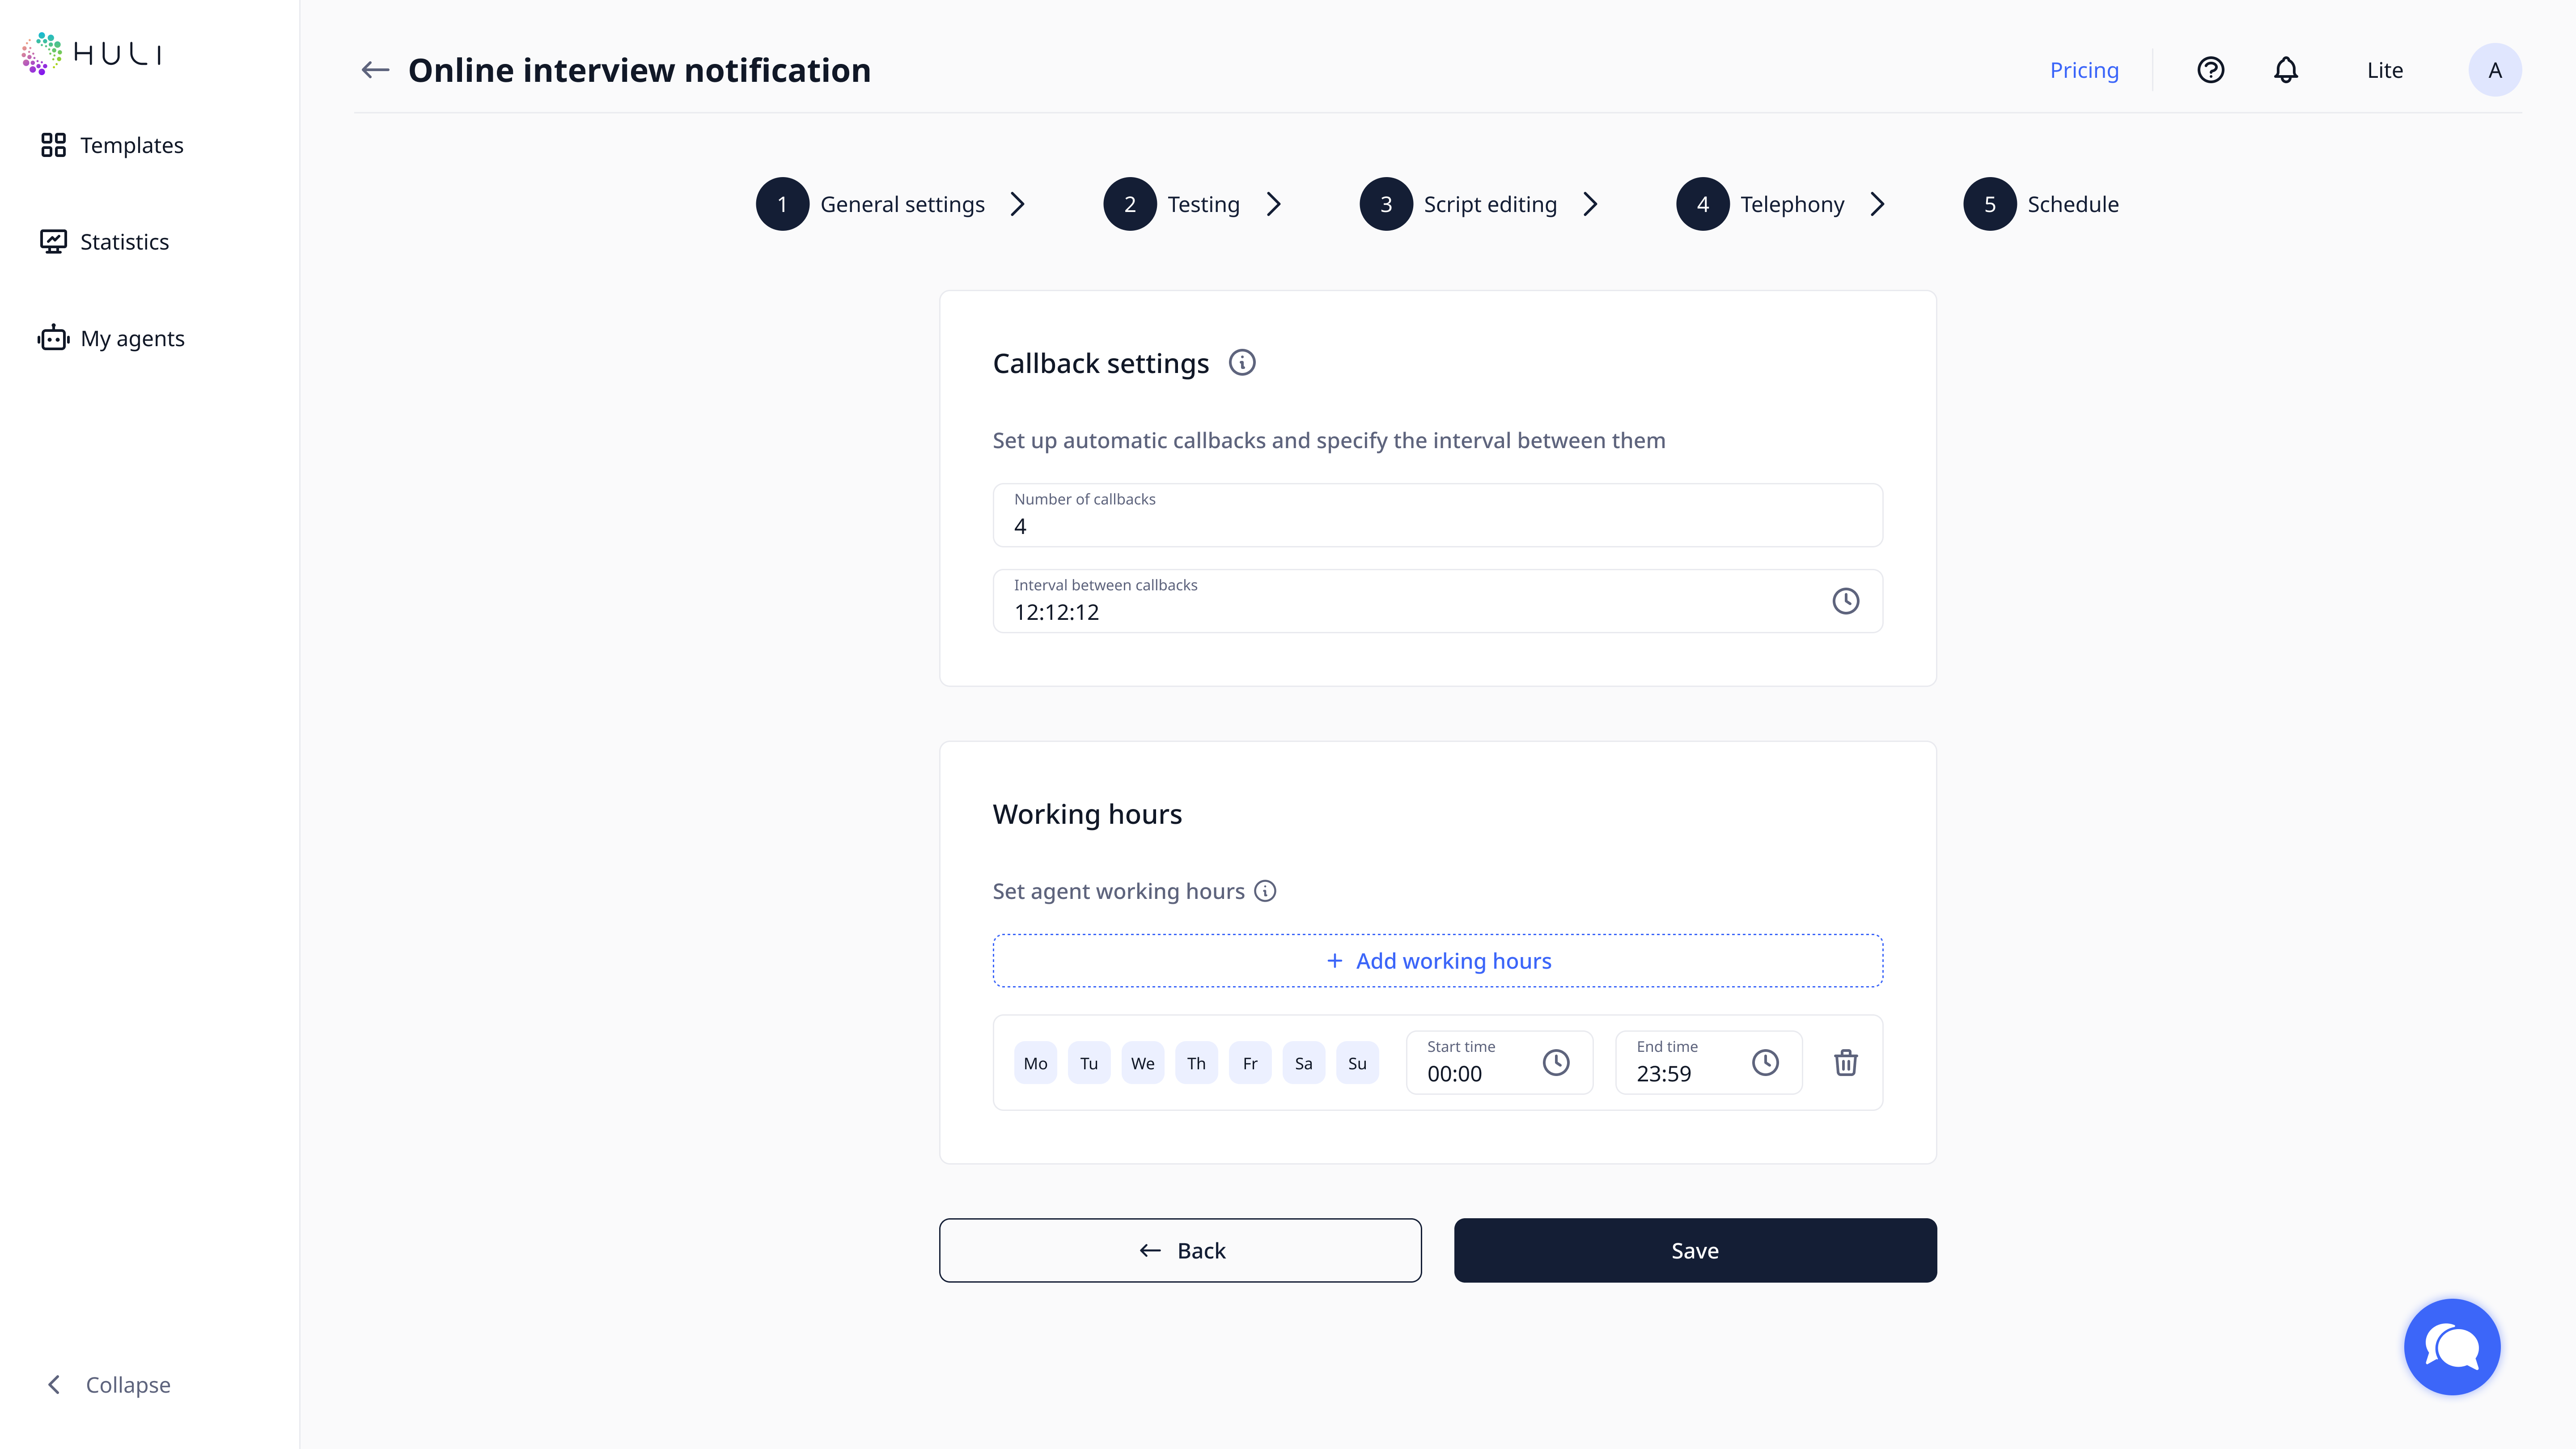
- Callback settings: Define how missed calls are handled
- Working days and hours: Specify when your agent should be active
¶ Step 8: Launch the agent
Save agent’s settings.
- Once all setup is complete, you can create your first campaign
- Important: If you selected a real announcer, wait until the announcer task shows "Completed" status
- Set up your campaign parameters at the campaign page, Read about it more at this page.
- Launch your voice agent to start handling customer calls
Your voice agent is now ready to provide professional customer service and support your business operations!